About This Blog:

Mainframe 10


This blog is to help us improve in archery and hunting. The information presented in this blog is of my own opinions, experiences, and knowledge. If you like the blog, please become a follower and feel free to post comments. Participation is encouraged. God Bless, Randy

Showing posts with label food sources. Show all posts

Thursday, September 2, 2010

(A) 14 Step Season Prep: Step 13- Pre-Season Scouting

Do you have a spotting scope? I would guess that most of you do not. The majority of Midwest hunters don't own one but if you hunt out west, or in western Kansas, I would venture to say that you probably do own a spotting scope. You might be asking yourself, why do we need a spotting scope if we are not hunting out west? Well, you don't. I don't own one either, however, I know I should. Let me explain my thought process and the advantages of a spotting scope.

It is the first week of September. We are only 3 weeks out from opening day in Kansas and 2 weeks out from opening day in Missouri. If you like to hunt early season, when the weather is still warm and the days are long, then it is time to get to work. Early season deer hunting takes a slightly different approach than hunting the rut. There are positives and negatives to deal with.

Let's start with the negatives. It is hot and difficult not to sweat walking to your stand. When the air is warm it also becomes much more difficult to control your human scent (it doesn't rise as quickly as a cold day). The bugs can drive you crazy this time of year and it is hard to see very far in the woods because the vegetation is thick. Now let's move to the positives. The deer are feeding heavily and are fairly predictable on their eating patterns. The bucks are in bachelor groups which means you may see a couple of shooters together. Their racks have just come out of velvet so they are shiny, clean and not busted up yet. The temperatures are warm so you won't be wearing bulky clothing and you aren't going to freeze out like a December hunt. The bucks should not have any hunting pressure on them and are probably bedded within close proximity to the major food sources or a water source.

By doing some pre-season scouting, you can get on these early season bucks. I try to hang observation stands prior to the season starting. These stands are strategically located to keep intrusion down to a minimum while being in a position to see where mature bucks are coming out into the fields to feed. Try to get into these positions at daybreak or sunset. This is where the spotting scope comes into play. High quality binoculars will work too but a spotting scope can really zoom in on the make up of a particular deer's rack. You should be able to get a good idea where bucks are entering and exiting the fields. This will also give you the opportunity to confirm the buck inventory of your hunting property (supported by your trail cameras).

Observatory stands, hay bails, and old country roads are great for scouting prior to the season opening. Ensure that you don't put any pressure on the deer during your pre-season scouting. The season is almost here and we don't want to tip the deer off that our favorite time of year has almost arrived.

Once the season has started, if you are having a hard time getting on a buck, try your pre-season scouting techniques at first light in the morning. Once you locate the buck you are after, quietly set up a stand inside the wood line where he left the field (getting between the food source and the bucks bedding area for the evening hunt). Chances are he will come walking by you if the wind is right in the evening. This year I am going to have a spotting scope for pre-season scouting, even if I have to borrow one! Good hunting and make sure you are shooting that bow a couple of times each week.

One last thing, take a kid hunting or fishing in the next couple of months (you have heard me say this before). It is just so awesome to see the positive impact on them.

Sunday, May 16, 2010

(A) 14 Step Season Prep: Step 10- Hanging Stands

I finally have all of our tree stands up and trimmed in for this fall. There are a few more stands that I will have to hang in late summer, for various reasons, but everything else is up and ready. You may be asking yourself why I have my stands up already. Let me explain why I do this and talk about stand placement.

Hanging Stands- I usually hang or move approximately 25 stands every year. Over the last five years I found it frustrating to try and hang all of these stands in late summer. August can be very hot and humid in Kansas. The woods are full of vegetation, ticks, bugs, snakes, and poison oak (a growing nemesis for me). It took a lot of time to hang and trim in the stands, so by the time I finished them, I wouldn't have much time to hunt the early season. Three years ago I started hanging my bedding area stands in the spring to avoid tipping off the deer in the fall. This worked really well for me and I loved having the stands already hung and brushed in, come deer season.

Over the last two years I have carried this idea over into all of my stands. Every spring I hang my stands and brush them in. You don't have to worry about scent, bumping deer, running chain saws, or fighting thick vegetation. The stands that I don't hang are in areas that I think they can be stolen. However, I still hang and brush in the stand. I just pull the stand down when I am finished. I also pull down stands that don't have removable straps. I don't want the straps to weather or stretch out as the tree grows. All the other hang on stands and ladder stands are left in place using tie wire.

I use a simple process that I should have thought about a long time ago. Once I have a stand hung in place, I take tie wire and triple it (you can also use a heavy gauge single strand). I use the tie wire to secure the stand in place on the tree. Then I remove all of the straps that secure the stand. I leave the cable and lock on the tree stand for an added safety measure. As I remove the straps, pull up rope, etc.- I place all of these items in a gallon size zip lock storage bag and label it with the stand number. If the stand has ladder climbing sticks, I will remove the sticks and hide them under a nearby log. I place the straps for the ladder sticks in the same zip lock bag. As I leave the tree stand location I will mark my access trail with reflective trail markers. Once deer season arrives and I hunt the stand for the first time, I will head out to the stand a half hour early with the zip lock bag and secure all the straps for the remaining season. The stand is already hung and trimmed in. Sounds easy, huh? Well, it is with a little planning and organization in the spring.

Be careful hanging ladder stands. When I am hanging a ladder stand I secure one end of my hoist rope to the seat of the ladder. I will then lean it up against the tree (this can be very difficult for one person). Make sure to step on he lowest rung of the ladder to set it in the ground. I will have my assistant hold the other end of the rope tight to keep the ladder secure against the tree as I climb. As they hold it against the tree I will secure it with the provided ratchet strap.

Here is a basic list of the tools that I use when hanging tree stands:
Pole saw, chain saw, hand saw, pull up rope, safety harness, fanny pack, back pack, zip lock bags, permanent marker, reflective trail markers, orange flagging, screw in steps, wind checker, compass, toilet paper, etc.

Stand types- I use four basic styles of tree stands. They are ladders, hang-ons, climbers, and the Lone Wolf Alpha (separate category for this one). For permanent use I utilize ladder stands and large hang-on stands. I especially like the ladder stands for areas that my Dad hunts. They are comfortable, easy to get in and out of, and safer. Occasionally I will also use a climbing tree stand to access a new hunting area.

The fourth style of stand that I love to use is the Lone Wolf Alpha hang-on. This stand is super light and easy to hang. It is extremely portable and adjustable too. I like to use these stands in areas that I only plan to hunt once or twice a year. They are also good for areas where a permanent stand may be stolen. If you can't afford a lot of stands then buy just one of these stands. Here is what you can do. Pick as many stand locations as you like. Hang this stand and trim in your shooting lanes. I like to use screw in steps on these stand set ups because you can leave them in the tree. I will then pull down the stand. Now you have multiple set ups to hunt based on deer travel, wind direction, etc. Just throw this stand up in the tree that you want to hunt. The tree is already prepared for you. I absolutely love this set up!

You can also easily use the Lone Wolf to hang above an existing stand to film a buddy's deer hunt. You should have at least one of these stands in your arsenal. They give you the ability to really move around, keep the deer guessing, and cover your hunting area. I also use this stand with the Lone Wolf ladder sticks in the place of a climbing tree stand. They all weigh about the same but with the ladder sticks I don't have to find a tree without low hanging limbs. Keep in mind that deer movement changes through out the phases of the rut. This stand can help you do the same.

You should already know this but I want to remind you to purchase a quality tree stand cable lock for your stands. I prefer the bicycle lock over the traditional padlock style. They can easily cut the padlock with bolt cutters but the bicycle style is much more difficult to get through. I engrave a number on all of my keys and the locks to keep them straight.

Stand locations- First, lets discuss how high you should hang your stand. You can only hunt at your best if you are comfortable with your set up and feel safe. This means staying within your comfort level. Maybe that is 10 feet or it could be 30 feet. You will have to decide for yourself. However, you must utilize a quality fall restraint device to keep you safe. You owe this to yourself and your family! No excuses!

If you shoot a recurve bow, I would suggest that you stay under 18'. However, if you shoot a compound bow you can go higher. My ladder stands range from 17-21'. My hang on stands are usually between 20-25'. I like to be high in the trees for a couple of reasons. I want the deer to have to look up high to see my silhouette. I want to stay out of their natural field of view. I also like to be high to stay in the upper wind thermals. They higher you are the harder it is for them to smell you. However, the higher you are, the steeper your shot angle, especially on close shots. Go up as high as your comfortable in the tree. I know many successful hunters that harvest deer in stands that are under 15'. In fact, one of the biggest deer I have ever seen, walked under my stand at 12' and never knew I was there. If I have my choice though, I will be sitting in the tree around 22'.

Stand placement- I like to hang stands around feeding areas, transition areas, and on the edge of bedding areas to cover all phases of the rut. I also like to have two different set ups based on wind direction. My pro dominant wind direction is out of the south. However, the November cold fronts come out of the north, so my stands are set up accordingly.

When I hang a stand I usually have someone with me. Before I trim in the shooting lanes I climb up in the tree and ask my assistant to walk the deer trails for me. This helps me to decide if the the stand is in the right location and where I should start trimming in my best shooting lanes. I want to be able to shoot the deer trails in all directions. Sometimes bucks will walk 10 yards downwind of heavily used deer trails, so make sure it is clear to shoot a little past the trail.

Don't forget to take a hard look at how you can slip in and out of your stand without bumping deer. Use vegetation, topography, creek bottoms, wind direction, etc. to help hide your approach. You can hunt a stand numerous times if the deer don't know when you are using it.

I hope this information helps you. I am still learning, so if you have something that works well for you that I didn't mention, please let us know. Go hang some stands. It's not too late.


Tuesday, April 27, 2010

(A) 14 Step Season Prep: Step 8- Planting Food Plots

Last week we finally finished planting our food plots. The timing was perfect because we had 4 straight days of rain which started the night we finished planting. Timing is everything when planting food plots. If we would have needed one more day to plant, it would have taken a minimum of 8 days before we could get back on the fields. When your planting, take advantage of the right weather when you can. If practical, I like to plant right before a rain.

My Dad and I currently plant all of the food plots on only one of the farms that we hunt (with one exception). This is the arrangement we have with the property owner. We plant 13 acres worth of gourmet foliage to hold the deer in the area. On one of the other farms we plant 3 acres of lush green clover. Our third farm is more of a transition area and isn't configured well for planting. The forth farm that we hunt is surrounded by crops until late November and the land owner has asked us not to plant food plots on the property.

There are a lot of variables that go into planting. Mainly the cost of fertilizer, seed, and fuel. The equipment that is available to you will also determine how far you can take this process. Over the last five years my Dad has purchased a disc, drag, plow, brush hog, and corn planter for his tractor. Dad reasonably purchased these items from farmers in the area that no longer used the equipment because it was too small for their big fields and larger tractors. Auctions are another good place to find cheap farming equipment but you will still need access to a tractor. We also bought a seed spreader and sprayer for the four wheeler. They make a lot of cool attachments for ATV's. Although they are expensive, this may be a better option for someone who doesn't own a tractor.

You may be asking yourself what should you plant on your farm. Well that really depends on your particular situation. There are too many variables to list in this article but I will give you some of the basic things to think about as I fill you in on what we planted. How you plant your seed will be dependent on the type of seed that you choose. It may need to be drilled or broadcast. We always spread 200-300 lbs an acre of fertilizer and then drag it into the soil of our food plots.

Field #1- This 3 acre field is bordered to the north by a treeline and a creek to the south. East and West of the field are good bedding areas. Thee years ago we planted half of the field in Whitetail Institutes Whitetail Clover. The deer love this stuff. The clover has come back so well each year that we haven't had to spray it for weeds. All we do is fertilize it in the spring and then mow it a couple of times during the summer with the brush hog. I have tried almost every clover out there and nothing has compared to Whitetail Clover! The second half of this field has been more of a testing plot in the past. The first year we planted it, we put in Buck Forage Oats with average results. Last year we planted cowpeas in the spring which the deer absolutely loved. However, the cowpeas didn't last into the fall so this year we planted standing corn. It has been our experience that the deer will hammer the clover from spring to early fall. As the fall season progresses they will switch to the corn during and after the rut. This should put deer in this field every day in all phases of the deer season.

Field #2- This is our largest field at approximately 5 acres. It is bordered by a treeline to the north and wooded creek bottom to the south. There is a pasture field to the east and CRP grass to the west. The deer usually approach this field from the south creek bottom and sometimes from the west CRP grass. Last year we planted this entire field in standing corn. The deer hammered it but not until late December and January. This was because the neighbor to the South had a 120 acre standing corn field that was too wet to harvest until December. Once his corn was harvested (which was abnormally late) the deer lived on our fields. This year we planted half of the field in standing corn and the other half in soybeans. The deer seem to love eating soybeans in the early fall. Then they stop eating them until late season. In the north east corner and south east corner of this field we placed 1/4 of an acre in Whitetail clover because this field is located so far away from fields #1 and #3, which also have clover in them. Again, this should put deer in this field almost every day.Don't forget to build cages for your fields that are at least 2x2 feet. That way the deer can't eat what is inside of them and you will now how much pressure you fields are receiving.

Field #3- This 2 acre field is in the shape of a horse shoe. We built it in the middle of the timber. There are bedding areas to the east and west of this field. To the north are all the trees we knocked down with the bulldozer. Sometimes the deer bed on the other side of these piles of trees. In the past this field has held a lot of moisture and been hard to plant. Last year we used Whitetail Institute's No Plow due to the excessive moisture. However, this field has drained well this year and isn't holding as much moisture. So, you can probably guess what we planted, it was Whitetail Clover. This field will be a gold mine especially in the early season.

Field #4- The last field we planted is 3 acres in size. It is bordered by CRP to the north and a creek bluff to the south. The east is made up of wooded fingers and the west is dense hardwood trees and bedding areas. Last year we planted most of the field in cowpeas. It held a lot of deer in the spring and summer but the plants no longer produced in the fall. So, like field #2, we planted half of this field in corn and the other half in soybeans to see how well they produced together.

With the exception of our clover fields last year, the deer did not hit our fields hard until late December. Many other hunters have told me they experienced similar results. This was because there were hundreds of acres of agricultural fields to the south of our property. Due to the wet fall last year, these fields were left standing all fall and became competition for our food plots. Would you go to a 5 acre corn field when you could go to one that was 240 acres? Plus the neighboring fields were full of milo and soybeans. This made it tough to hunt around our food plots last year. However, once the neighbor harvested these crops, our food plots were quickly consumed.

We don't necessarily plant food plots to hunt over them. Actually we try to hunt between the food plots and the bedding areas. You can quickly educate deer if you continually hunt over a food plot. The plantings are to keep the deer healthy and in the area. If you have a lot of agricultural fields in the area, then maybe you want to start by planting some Whitetail Clover. If you don't have much for crops in your hunting area, then you had better make your food plot as large as you can because they will probably eat them down before they can mature.

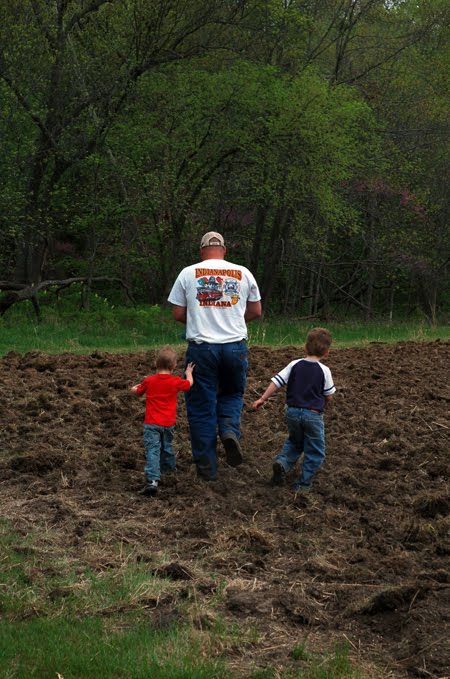
I encourage you to contact me if you have questions about planting food plots. I can only offer advise based on my experience but I would like to help you get results the first time you try this. Let me know if you have any suggestions, recommendations, or questions. If you are going to do some planting and you have kids, try to get them involved. I took my two boys with me to seed a field and they had a blast. Good hunting!

Tuesday, March 9, 2010

(A) 14 Step Season Prep: Step 4- Post Season Scouting and Shed Hunting

Okay, so we have pulled down our stands or moved them to better locations. You have already initiated the scouting process. By using the knowledge that you learned last year, while sitting in last seasons stand locations, we have learned something more about deer movement. In Step #3 you should have scouted around your old tree stand locations to move the stand to a better tree or pulled the stand from an unproductive area. Now comes the time for exploration. I really enjoy scouting and shed hunting because they can tell me what I have been missing the previous season. So let's talk about both of these subjects and how they relate to each other.

1. Time to stir up the woods: Do you know where all of the bedding areas are on your property? Do you know where the trails are located that lead from bed to feed? Where are the transition areas that deer use to travel from bed to feed? Where are the buck staging areas located that deer use waiting to enter your food sources? Don't feel disappointed if you don't know the answer to all of these questions. However, you will be more successful and confident if you spend the time to research the answers. Now is the perfect time because there is no vegetation in the woods, the days are a little warmer, football season is over, and the NCAA basketball tournament is a few weeks away. Get outside and start walking, but don't just look for obvious deer trails. Let's discuss some of the things I try look for.

2. Feeding areas: This is always an easy place to start. Walk just inside the field edges and look for trails coming into the fields. Usually this will be on the inside corner of the field but walk the whole perimeter. Try to think like a deer and how they will access the field, feel the most comfortable eating out in the open, and where the best shadows will likely occur (deer feel safer eating in the shadows before dark). Tree stands in this area should be used primarily for early and late season when deer concentrate on food sources. However, you can also place observatory stands a safe distance to food sources so you don't tip deer off. There should be bedding areas in close proximity to the food source that deer will use once the vegetation returns. As you start working back into the woods, searching for bedding areas and transition areas, pay attention for other potential food sources. For example, if you find white oak trees clumped together on a ridge top, you have found an alternative feeding area.

3. Bedding areas: Where are the does and bucks likely to bed during the early season? As previously stated, they will not usually bed together but will both be in close proximity to the feeding areas. Concentrate on thick cover within a couple hundred yards of the the food sources. When it is hot in early season (September), deer usually don't travel far unless they are pressured. Mature bucks like to use ravines and creek bottoms because they generally stay cooler this time of year. Once you have located these areas, it is time to focus on the bedding areas that deer will use during the rut. I like to concentrate on thick bedding areas located further away from the food sources. I do this because once the vegetation is minimized, deer usually travel further to reach better bedding areas for security cover. These will be the bedding areas that does use once the leaves drop in the woods. Does also like these areas to hide from the constant buck harassment they encounter during the rut. A mature buck will be checking downwind of these bedding areas often. However, if you have something like a cedar thicket close to a food source, with very minimal pressure, you may have a great all season bedding area!

4. Transition areas: These are the areas that can be spectacular hunting areas because deer use them constantly. You can also usually slip in or out of these areas easily to access stand locations. This is where I like to concentrate my search while looking for heavily used trails. Once I have determined my regular food sources and bedding areas, I simply find the best intersection of trails that bring them together. I like to hunt transition areas most of the time for a couple of reasons. Transition areas keep you safely away from bumping deer in their bedding areas and don't alert deer to hunting pressure once they are out in the fields feeding. Yet, they still need the transition areas to get from point A to point B. Give these areas a try this season.

5. Staging areas: These areas are usually located 50-100 yards from the feeding areas. Mature bucks will usually use these areas waiting for the sun to go down before entering the fields. If the deer herd is pressured, all of them may browse in staging areas until night fall. Staging areas are excellent places for afternoon hunts, especially during early season. In fact, I feel more confident hunting mature bucks in staging areas instead of sitting over food plots. However, I have not experienced great success hunting staging areas in the mornings. If you have, I would like to hear about your experiences.

6. Shed Hunting: As you scout to learn your hunting property keep your eyes open for deer sheds. You never know where you will find them. I have found sheds in fields, CRP grass, bedding thickets and next to out buildings. Sheds can tell you what deer made it through the winter or what deer you have living on your property that your trail cameras missed. Although shed hunting is fun for me, I prefer to concentrate my time in the woods on learning how the deer live there. If I happen to stumble across a shed, that is just an added bonus. However, there are occasions that I strictly concentrate on shed hunting. My family loves to be outdoors. So, I can use this opportunity in the spring to take my family out in the woods and search for sheds. The kids love it, they get very excited and have a sense of accomplishment when they find a shed antler. To be honest, if things are slow shed hunting, sometimes I place previously found sheds ahead of my kids to make the trip more successful for them. When you have completed your shed hunts, try to match up the sheds and see if the same deer is living on your farm from last year. I know of two farmers that live a mile away from each other. They each found one side of shed antlers. A couple of years later, they were talking about the sheds they had each found (obviously belonging to the same deer). When they put each side together, they had the sheds scored, finding the deer would have scored well over 200". I saw these sheds personally and it is hard to describe the size of this rack. I wish I would have taken a picture of them.

7. Additional things to look for: If your hunting property has hills or varied terrain, you can use that to your advantage. Look for benches on the sides of ridges or saddles going over a ridge. The points of ridges are also excellent ambush locations. Also look for points extending out into fields. Regardless of terrain, you should also scout creek crossings, funnels, pinch points, tree lines, water sources and edges where the vegetation density makes a change. To learn more about topography, read Brad Herndon's book "Mapping Trophy Bucks".

So, get out in the woods by yourself for some scouting and with your family for some shed hunting. The deer have dropped their antlers and you can see a long ways in the woods. Scout and learn various aspects of your property. If you have a big farm or numerous farms, take notes after scouting so you don't forget any important details. Think about how you can make access to or from various tree stand locations when hunting bedding, transition, staging or feeding areas. Get on the inter-net and print off arial photographs of your hunting property. This will help to keep you oriented and clarify things on the property as you scout. Good luck and have fun!