We have finally reached the last step in our quest to be completely ready for opening deer season. Step 14 is basically a look back at all we have accomplished to get ready for the fall and to review all of our hard work:
Step 1- Analyzed our equipment that we used last year to determine the need for any changes.
Step 2- Talked about the basics of shooting form and how to improve our practice sessions.
Step 3 and 4- Pulled our old stands and scouted for new stand locations.
Step 5 and 6- Talked to landowners in an effort to find new farms to hunt.
Step 7- Took a break and hunted thunder chickens.
Step 8- Planted spring food plots.
Step 9- Built or improved buck bedding areas.
Step 10- Began hanging all remaining tree stands (especially in the bedding areas).
Step 11- Summer shooting sessions to keep up our archery skills.
Step 12- Uses for trail cameras.
Step 13- The need for pre-season scouting.
Over the next couple of weeks make sure you complete gear checks for all of your hunting equipment. Be sure to wash everything in scent free soap. Make sure you are shooting your bow well and your broadheads are sighted in. Continue to practice to maintain a high confidence level. Keep checking your trail cameras as you finalize your buck inventory. Keep an eye on your food plots in the event they need a shot of fertilizer. Don't forget to mow your clovers down to 6-8" in mid-September.
I don't know about you but I have accomplished my goal this year. I am completely ready for opening day with no work to be done. This will be a good reference for us to use again after this deer season. What a great feeling to have no pressure, no questions about why I didn't do this or that last spring, and no regrets. It's time to focus on killing a mature buck. Over the next couple of months I will try to stay current on posting moon phases and the best times for buck movement. There will be updates on our hunting progress throughout the season. I will also talk about some of the issues that we face during deer season. And lastly, if I get time, I will share some hunting stories. Good hunting!

Showing posts with label 14 Step Season Prep. Show all posts
Showing posts with label 14 Step Season Prep. Show all posts
Monday, September 13, 2010

Thursday, September 2, 2010
(A) 14 Step Season Prep: Step 13- Pre-Season Scouting
Do you have a spotting scope? I would guess that most of you do not. The majority of Midwest hunters don't own one but if you hunt out west, or in western Kansas, I would venture to say that you probably do own a spotting scope. You might be asking yourself, why do we need a spotting scope if we are not hunting out west? Well, you don't. I don't own one either, however, I know I should. Let me explain my thought process and the advantages of a spotting scope.
It is the first week of September. We are only 3 weeks out from opening day in Kansas and 2 weeks out from opening day in Missouri. If you like to hunt early season, when the weather is still warm and the days are long, then it is time to get to work. Early season deer hunting takes a slightly different approach than hunting the rut. There are positives and negatives to deal with.
Let's start with the negatives. It is hot and difficult not to sweat walking to your stand. When the air is warm it also becomes much more difficult to control your human scent (it doesn't rise as quickly as a cold day). The bugs can drive you crazy this time of year and it is hard to see very far in the woods because the vegetation is thick. Now let's move to the positives. The deer are feeding heavily and are fairly predictable on their eating patterns. The bucks are in bachelor groups which means you may see a couple of shooters together. Their racks have just come out of velvet so they are shiny, clean and not busted up yet. The temperatures are warm so you won't be wearing bulky clothing and you aren't going to freeze out like a December hunt. The bucks should not have any hunting pressure on them and are probably bedded within close proximity to the major food sources or a water source.
By doing some pre-season scouting, you can get on these early season bucks. I try to hang observation stands prior to the season starting. These stands are strategically located to keep intrusion down to a minimum while being in a position to see where mature bucks are coming out into the fields to feed. Try to get into these positions at daybreak or sunset. This is where the spotting scope comes into play. High quality binoculars will work too but a spotting scope can really zoom in on the make up of a particular deer's rack. You should be able to get a good idea where bucks are entering and exiting the fields. This will also give you the opportunity to confirm the buck inventory of your hunting property (supported by your trail cameras).
Observatory stands, hay bails, and old country roads are great for scouting prior to the season opening. Ensure that you don't put any pressure on the deer during your pre-season scouting. The season is almost here and we don't want to tip the deer off that our favorite time of year has almost arrived.
Once the season has started, if you are having a hard time getting on a buck, try your pre-season scouting techniques at first light in the morning. Once you locate the buck you are after, quietly set up a stand inside the wood line where he left the field (getting between the food source and the bucks bedding area for the evening hunt). Chances are he will come walking by you if the wind is right in the evening. This year I am going to have a spotting scope for pre-season scouting, even if I have to borrow one! Good hunting and make sure you are shooting that bow a couple of times each week.
 One last thing, take a kid hunting or fishing in the next couple of months (you have heard me say this before). It is just so awesome to see the positive impact on them.


It is the first week of September. We are only 3 weeks out from opening day in Kansas and 2 weeks out from opening day in Missouri. If you like to hunt early season, when the weather is still warm and the days are long, then it is time to get to work. Early season deer hunting takes a slightly different approach than hunting the rut. There are positives and negatives to deal with.
Let's start with the negatives. It is hot and difficult not to sweat walking to your stand. When the air is warm it also becomes much more difficult to control your human scent (it doesn't rise as quickly as a cold day). The bugs can drive you crazy this time of year and it is hard to see very far in the woods because the vegetation is thick. Now let's move to the positives. The deer are feeding heavily and are fairly predictable on their eating patterns. The bucks are in bachelor groups which means you may see a couple of shooters together. Their racks have just come out of velvet so they are shiny, clean and not busted up yet. The temperatures are warm so you won't be wearing bulky clothing and you aren't going to freeze out like a December hunt. The bucks should not have any hunting pressure on them and are probably bedded within close proximity to the major food sources or a water source.
By doing some pre-season scouting, you can get on these early season bucks. I try to hang observation stands prior to the season starting. These stands are strategically located to keep intrusion down to a minimum while being in a position to see where mature bucks are coming out into the fields to feed. Try to get into these positions at daybreak or sunset. This is where the spotting scope comes into play. High quality binoculars will work too but a spotting scope can really zoom in on the make up of a particular deer's rack. You should be able to get a good idea where bucks are entering and exiting the fields. This will also give you the opportunity to confirm the buck inventory of your hunting property (supported by your trail cameras).
Observatory stands, hay bails, and old country roads are great for scouting prior to the season opening. Ensure that you don't put any pressure on the deer during your pre-season scouting. The season is almost here and we don't want to tip the deer off that our favorite time of year has almost arrived.
Once the season has started, if you are having a hard time getting on a buck, try your pre-season scouting techniques at first light in the morning. Once you locate the buck you are after, quietly set up a stand inside the wood line where he left the field (getting between the food source and the bucks bedding area for the evening hunt). Chances are he will come walking by you if the wind is right in the evening. This year I am going to have a spotting scope for pre-season scouting, even if I have to borrow one! Good hunting and make sure you are shooting that bow a couple of times each week.
 One last thing, take a kid hunting or fishing in the next couple of months (you have heard me say this before). It is just so awesome to see the positive impact on them.

Sunday, August 15, 2010
(A) 14 Step Season Prep: Step 12- Trail Cameras
It is time to brush the dust off of those trail cameras and get them out in the field. A couple of weeks ago I put out 5 Bushnell trail cameras hoping to catch a snap shot of a monster buck on one of our hunting properties. This is a good practice to ensure the cameras are working correctly as we begin the season. In August, the big boys start feeding heavily and will let their guard down a bit, becoming more visible.
Cameras have became a vital part of my hunting strategy. They are especially important during August and September as I take a buck inventory of the deer currently using our properties. This will usually dictate my basic harvest goals for the season. Let me use last season as an example. I had pictures of two different mainframe 10 pointers and a twelve pointer. I was set on shooting a buck in the low 150's to 160's based on deer I had pictures of. Now, if you have read my previous articles, you know that I abandoned this strategy when I saw a buck in the 170-180" class. Some deer will come from other properties during the rut and sometimes deer are never caught on film by the trail cameras. But the point is the trail cameras give you a general idea of what a trophy is for your particular area.
There have been many times over the last 11 seasons that I elected to pass up a quality buck holding out for something bigger. However, if I would have scouted and utilized trail cameras, I would have realized that the bucks I was passing on, were the mature deer on the farm that particular year. Maybe the biggest bucks on your property are in the 120" class. If they are mature (4 years or older) than you should be proud of yourself if you harvest one. You can't kill a bigger deer if they don't exist on your property. Keep your expectations realistic to continually enjoy this sport.
Here are a couple of things to remember when using trail cameras:
1. Make sure your batteries are always fresh so you can leave them out for approximately 3 weeks (remain patient because this will keep your sent and intrusion down to a minimum).
2. Don't hang cameras in bedding areas this time of year. You will only be bumping deer out of their sanctuary. Stick to funnels, travel routes to and from feeding areas, and food plots.
3. Take wedges or shims with you to install your trail cameras. They work great when you are trying to get the right angle on the field of view. I have also recently purchased a couple of trail camera tripods for areas that don't have a good selection of trees (I will let you know how I like them). Existing fence posts work good too.
4. Keep your camera at the elevation of your waist or chest and keep the slope of the background in mind too.
5. Make sure your camera is pointed away from the sun (usually not to the south) so you don't get sun spots.
6. Wear gloves when handling your camera in the field to minimize your human sent. I prefer to use rubber gloves.
7. Keep two SD cards assigned to each camera (label them) to keep track of which one goes with which camera (if you use multiple cameras). If an SD card goes bad, you should be able to figure out which one it is.
8. Angle your camera so you can get a couple of shots of a deer as he walks to or away from the camera. Bucks are in bachelor groups this time of year and it helps to have a field or opening in the background which may show additional deer further away. If you are getting pictures of only a deer's front or hind quarters, you need to turn your camera a bit more.
I continue to utilize my trail cameras all season long and after the season is over. Throughout the season I get an idea of what bucks have moved on to the property, the time of day they are moving, and what areas are receiving the most deer traffic. This can also aid in determining the rut stages. After the season is over, I get an idea of what deer are still alive and the sheds that I should search for in the spring.
Cameras have became a vital part of my hunting strategy. They are especially important during August and September as I take a buck inventory of the deer currently using our properties. This will usually dictate my basic harvest goals for the season. Let me use last season as an example. I had pictures of two different mainframe 10 pointers and a twelve pointer. I was set on shooting a buck in the low 150's to 160's based on deer I had pictures of. Now, if you have read my previous articles, you know that I abandoned this strategy when I saw a buck in the 170-180" class. Some deer will come from other properties during the rut and sometimes deer are never caught on film by the trail cameras. But the point is the trail cameras give you a general idea of what a trophy is for your particular area.
There have been many times over the last 11 seasons that I elected to pass up a quality buck holding out for something bigger. However, if I would have scouted and utilized trail cameras, I would have realized that the bucks I was passing on, were the mature deer on the farm that particular year. Maybe the biggest bucks on your property are in the 120" class. If they are mature (4 years or older) than you should be proud of yourself if you harvest one. You can't kill a bigger deer if they don't exist on your property. Keep your expectations realistic to continually enjoy this sport.
Here are a couple of things to remember when using trail cameras:
1. Make sure your batteries are always fresh so you can leave them out for approximately 3 weeks (remain patient because this will keep your sent and intrusion down to a minimum).
2. Don't hang cameras in bedding areas this time of year. You will only be bumping deer out of their sanctuary. Stick to funnels, travel routes to and from feeding areas, and food plots.
3. Take wedges or shims with you to install your trail cameras. They work great when you are trying to get the right angle on the field of view. I have also recently purchased a couple of trail camera tripods for areas that don't have a good selection of trees (I will let you know how I like them). Existing fence posts work good too.
4. Keep your camera at the elevation of your waist or chest and keep the slope of the background in mind too.
5. Make sure your camera is pointed away from the sun (usually not to the south) so you don't get sun spots.
6. Wear gloves when handling your camera in the field to minimize your human sent. I prefer to use rubber gloves.
7. Keep two SD cards assigned to each camera (label them) to keep track of which one goes with which camera (if you use multiple cameras). If an SD card goes bad, you should be able to figure out which one it is.
8. Angle your camera so you can get a couple of shots of a deer as he walks to or away from the camera. Bucks are in bachelor groups this time of year and it helps to have a field or opening in the background which may show additional deer further away. If you are getting pictures of only a deer's front or hind quarters, you need to turn your camera a bit more.
I continue to utilize my trail cameras all season long and after the season is over. Throughout the season I get an idea of what bucks have moved on to the property, the time of day they are moving, and what areas are receiving the most deer traffic. This can also aid in determining the rut stages. After the season is over, I get an idea of what deer are still alive and the sheds that I should search for in the spring.
To wrap this up, I checked my trail cameras yesterday. Over the last two and a half weeks we had temperatures in the high 90's everyday. This really slowed down the big buck activity. All I had on my cameras were smaller bucks, slick heads (does) and fawns. I also managed to get pictures of thunder chickens, a bobcat, coyote, fox, and a few bandits (coons). Maybe the next three weeks will show me something more if it is not so hot (should have set up a camera on some water sources). You will never know until you get your cameras out there working for you.
Tuesday, June 29, 2010
(A) 14 Step Season Prep: Step 11- Summer Shooting
This is about the only time during the entire year when I don't think a lot about hunting. Some years have me feeling a little burned by now. I am usually tired from working hard on stands and food plots. Turkey season is over and I am just ready for a break. I used to be a tournament fisherman for Bass when I lived out west. So I am always searching for an opportunity to go fishing and catch some bucket mouths. The days are getting hot, the kids want to be outside doing something all day (usually at the pool), and there are so many things to do around the house.
It is okay to mentally take a break from deer season. Fall is around the corner so take this time to spend some quality time with your family. My oldest son enjoys fishing more than anything else. So I take him fishing when I have the opportunity. If you haven't witnessed a kid catching fish, you are really missing out! Take a kid fishing and see what happens. They are experiencing the same emotions that we have when we shoot a 170" buck.
During the month of July we always take a family vacation up to northern Wisconsin at my grandparents cabin. I usually spend June working as much as a I can to save up money for the trip. I try to take three weeks off from work for this trip so my kids can really enjoy some time at the lake and give them some quality Dad time. Once I return from the trip I usually have my fill of catching fish and I am charged back up for deer hunting.
July and August are always the hottest months out of the year. It can be hard to get motivated to shoot bows when it gets hot outside (usually sweating like a pig) and you have to deal with bugs (mosquito's, chiggers, ticks, flies, etc.). I like to focus my efforts on shooting only once a week during this time of year. My Dad usually keeps the grass cut short where we shoot our bows and this helps keep the bugs down. I prefer to shoot early in the morning when it is the coolest part of the day but I will also shoot in the evenings before dark.
I like to make the shooting adventurous and fun this time of year. We will set up a little shooting course at my Dad's house. We will shoot our bows out of a ladder stand or ground blind, up and down slopes. We will set up multiple deer targets at various angles to simulate different shot conditions. We also practice shooting long range shots at 60+ yards. Occasionally we will shoot from the roof of my Dad's garage but be careful if you do this (not all roofs are created equal). I have seen some guys tape balloons into the middle of old tires and then roll them down a hill. Your partner shoots at the balloon as if the deer is on the run (make sure of your back drop if you try this). Be experimental and try different things to make your shooting sessions new and fun. My brother-in-law will shoot from almost any body position that he can think of (sitting, on his knees, on his back, turned 180 degrees, etc). Try different shooting set ups and try to shoot with a friend. It makes archery more enjoyable.
Summer should be the cut off for making any major equipment changes. If you make any changes in the fall it is going to affect your confidence and probably your accuracy. I always go through all of my shooting equipment this time of year and double check every detail. I want to spend my last shooting sessions at the end of summer to only dial in broadheads. I don't want to mess with anything else. Once September rolls around I stop shooting my field points and switch to broadheads. Our Kansas archery season starts at the end of September and I like to make the switch to broadheads approximately one month before the season begins.
Well, July is almost here so I will cover Step 12 of this 14 step process in August. Good shooting and go catch a big fish this summer!
It is okay to mentally take a break from deer season. Fall is around the corner so take this time to spend some quality time with your family. My oldest son enjoys fishing more than anything else. So I take him fishing when I have the opportunity. If you haven't witnessed a kid catching fish, you are really missing out! Take a kid fishing and see what happens. They are experiencing the same emotions that we have when we shoot a 170" buck.
During the month of July we always take a family vacation up to northern Wisconsin at my grandparents cabin. I usually spend June working as much as a I can to save up money for the trip. I try to take three weeks off from work for this trip so my kids can really enjoy some time at the lake and give them some quality Dad time. Once I return from the trip I usually have my fill of catching fish and I am charged back up for deer hunting.
July and August are always the hottest months out of the year. It can be hard to get motivated to shoot bows when it gets hot outside (usually sweating like a pig) and you have to deal with bugs (mosquito's, chiggers, ticks, flies, etc.). I like to focus my efforts on shooting only once a week during this time of year. My Dad usually keeps the grass cut short where we shoot our bows and this helps keep the bugs down. I prefer to shoot early in the morning when it is the coolest part of the day but I will also shoot in the evenings before dark.
I like to make the shooting adventurous and fun this time of year. We will set up a little shooting course at my Dad's house. We will shoot our bows out of a ladder stand or ground blind, up and down slopes. We will set up multiple deer targets at various angles to simulate different shot conditions. We also practice shooting long range shots at 60+ yards. Occasionally we will shoot from the roof of my Dad's garage but be careful if you do this (not all roofs are created equal). I have seen some guys tape balloons into the middle of old tires and then roll them down a hill. Your partner shoots at the balloon as if the deer is on the run (make sure of your back drop if you try this). Be experimental and try different things to make your shooting sessions new and fun. My brother-in-law will shoot from almost any body position that he can think of (sitting, on his knees, on his back, turned 180 degrees, etc). Try different shooting set ups and try to shoot with a friend. It makes archery more enjoyable.
Summer should be the cut off for making any major equipment changes. If you make any changes in the fall it is going to affect your confidence and probably your accuracy. I always go through all of my shooting equipment this time of year and double check every detail. I want to spend my last shooting sessions at the end of summer to only dial in broadheads. I don't want to mess with anything else. Once September rolls around I stop shooting my field points and switch to broadheads. Our Kansas archery season starts at the end of September and I like to make the switch to broadheads approximately one month before the season begins.
Well, July is almost here so I will cover Step 12 of this 14 step process in August. Good shooting and go catch a big fish this summer!
Sunday, May 16, 2010
(A) 14 Step Season Prep: Step 10- Hanging Stands
I finally have all of our tree stands up and trimmed in for this fall. There are a few more stands that I will have to hang in late summer, for various reasons, but everything else is up and ready. You may be asking yourself why I have my stands up already. Let me explain why I do this and talk about stand placement.
Hanging Stands- I usually hang or move approximately 25 stands every year. Over the last five years I found it frustrating to try and hang all of these stands in late summer. August can be very hot and humid in Kansas. The woods are full of vegetation, ticks, bugs, snakes, and poison oak (a growing nemesis for me). It took a lot of time to hang and trim in the stands, so by the time I finished them, I wouldn't have much time to hunt the early season. Three years ago I started hanging my bedding area stands in the spring to avoid tipping off the deer in the fall. This worked really well for me and I loved having the stands already hung and brushed in, come deer season.
Over the last two years I have carried this idea over into all of my stands. Every spring I hang my stands and brush them in. You don't have to worry about scent, bumping deer, running chain saws, or fighting thick vegetation. The stands that I don't hang are in areas that I think they can be stolen. However, I still hang and brush in the stand. I just pull the stand down when I am finished. I also pull down stands that don't have removable straps. I don't want the straps to weather or stretch out as the tree grows. All the other hang on stands and ladder stands are left in place using tie wire.
I use a simple process that I should have thought about a long time ago. Once I have a stand hung in place, I take tie wire and triple it (you can also use a heavy gauge single strand). I use the tie wire to secure the stand in place on the tree. Then I remove all of the straps that secure the stand. I leave the cable and lock on the tree stand for an added safety measure. As I remove the straps, pull up rope, etc.- I place all of these items in a gallon size zip lock storage bag and label it with the stand number. If the stand has ladder climbing sticks, I will remove the sticks and hide them under a nearby log. I place the straps for the ladder sticks in the same zip lock bag. As I leave the tree stand location I will mark my access trail with reflective trail markers. Once deer season arrives and I hunt the stand for the first time, I will head out to the stand a half hour early with the zip lock bag and secure all the straps for the remaining season. The stand is already hung and trimmed in. Sounds easy, huh? Well, it is with a little planning and organization in the spring.
Be careful hanging ladder stands. When I am hanging a ladder stand I secure one end of my hoist rope to the seat of the ladder. I will then lean it up against the tree (this can be very difficult for one person). Make sure to step on he lowest rung of the ladder to set it in the ground. I will have my assistant hold the other end of the rope tight to keep the ladder secure against the tree as I climb. As they hold it against the tree I will secure it with the provided ratchet strap.
Here is a basic list of the tools that I use when hanging tree stands:
Pole saw, chain saw, hand saw, pull up rope, safety harness, fanny pack, back pack, zip lock bags, permanent marker, reflective trail markers, orange flagging, screw in steps, wind checker, compass, toilet paper, etc.
Stand types- I use four basic styles of tree stands. They are ladders, hang-ons, climbers, and the Lone Wolf Alpha (separate category for this one). For permanent use I utilize ladder stands and large hang-on stands. I especially like the ladder stands for areas that my Dad hunts. They are comfortable, easy to get in and out of, and safer. Occasionally I will also use a climbing tree stand to access a new hunting area.
The fourth style of stand that I love to use is the Lone Wolf Alpha hang-on. This stand is super light and easy to hang. It is extremely portable and adjustable too. I like to use these stands in areas that I only plan to hunt once or twice a year. They are also good for areas where a permanent stand may be stolen. If you can't afford a lot of stands then buy just one of these stands. Here is what you can do. Pick as many stand locations as you like. Hang this stand and trim in your shooting lanes. I like to use screw in steps on these stand set ups because you can leave them in the tree. I will then pull down the stand. Now you have multiple set ups to hunt based on deer travel, wind direction, etc. Just throw this stand up in the tree that you want to hunt. The tree is already prepared for you. I absolutely love this set up!
You can also easily use the Lone Wolf to hang above an existing stand to film a buddy's deer hunt. You should have at least one of these stands in your arsenal. They give you the ability to really move around, keep the deer guessing, and cover your hunting area. I also use this stand with the Lone Wolf ladder sticks in the place of a climbing tree stand. They all weigh about the same but with the ladder sticks I don't have to find a tree without low hanging limbs. Keep in mind that deer movement changes through out the phases of the rut. This stand can help you do the same.
You should already know this but I want to remind you to purchase a quality tree stand cable lock for your stands. I prefer the bicycle lock over the traditional padlock style. They can easily cut the padlock with bolt cutters but the bicycle style is much more difficult to get through. I engrave a number on all of my keys and the locks to keep them straight.
Stand locations- First, lets discuss how high you should hang your stand. You can only hunt at your best if you are comfortable with your set up and feel safe. This means staying within your comfort level. Maybe that is 10 feet or it could be 30 feet. You will have to decide for yourself. However, you must utilize a quality fall restraint device to keep you safe. You owe this to yourself and your family! No excuses!
If you shoot a recurve bow, I would suggest that you stay under 18'. However, if you shoot a compound bow you can go higher. My ladder stands range from 17-21'. My hang on stands are usually between 20-25'. I like to be high in the trees for a couple of reasons. I want the deer to have to look up high to see my silhouette. I want to stay out of their natural field of view. I also like to be high to stay in the upper wind thermals. They higher you are the harder it is for them to smell you. However, the higher you are, the steeper your shot angle, especially on close shots. Go up as high as your comfortable in the tree. I know many successful hunters that harvest deer in stands that are under 15'. In fact, one of the biggest deer I have ever seen, walked under my stand at 12' and never knew I was there. If I have my choice though, I will be sitting in the tree around 22'.
Stand placement- I like to hang stands around feeding areas, transition areas, and on the edge of bedding areas to cover all phases of the rut. I also like to have two different set ups based on wind direction. My pro dominant wind direction is out of the south. However, the November cold fronts come out of the north, so my stands are set up accordingly.
When I hang a stand I usually have someone with me. Before I trim in the shooting lanes I climb up in the tree and ask my assistant to walk the deer trails for me. This helps me to decide if the the stand is in the right location and where I should start trimming in my best shooting lanes. I want to be able to shoot the deer trails in all directions. Sometimes bucks will walk 10 yards downwind of heavily used deer trails, so make sure it is clear to shoot a little past the trail.
Don't forget to take a hard look at how you can slip in and out of your stand without bumping deer. Use vegetation, topography, creek bottoms, wind direction, etc. to help hide your approach. You can hunt a stand numerous times if the deer don't know when you are using it.
I hope this information helps you. I am still learning, so if you have something that works well for you that I didn't mention, please let us know. Go hang some stands. It's not too late.
Hanging Stands- I usually hang or move approximately 25 stands every year. Over the last five years I found it frustrating to try and hang all of these stands in late summer. August can be very hot and humid in Kansas. The woods are full of vegetation, ticks, bugs, snakes, and poison oak (a growing nemesis for me). It took a lot of time to hang and trim in the stands, so by the time I finished them, I wouldn't have much time to hunt the early season. Three years ago I started hanging my bedding area stands in the spring to avoid tipping off the deer in the fall. This worked really well for me and I loved having the stands already hung and brushed in, come deer season.
Over the last two years I have carried this idea over into all of my stands. Every spring I hang my stands and brush them in. You don't have to worry about scent, bumping deer, running chain saws, or fighting thick vegetation. The stands that I don't hang are in areas that I think they can be stolen. However, I still hang and brush in the stand. I just pull the stand down when I am finished. I also pull down stands that don't have removable straps. I don't want the straps to weather or stretch out as the tree grows. All the other hang on stands and ladder stands are left in place using tie wire.
I use a simple process that I should have thought about a long time ago. Once I have a stand hung in place, I take tie wire and triple it (you can also use a heavy gauge single strand). I use the tie wire to secure the stand in place on the tree. Then I remove all of the straps that secure the stand. I leave the cable and lock on the tree stand for an added safety measure. As I remove the straps, pull up rope, etc.- I place all of these items in a gallon size zip lock storage bag and label it with the stand number. If the stand has ladder climbing sticks, I will remove the sticks and hide them under a nearby log. I place the straps for the ladder sticks in the same zip lock bag. As I leave the tree stand location I will mark my access trail with reflective trail markers. Once deer season arrives and I hunt the stand for the first time, I will head out to the stand a half hour early with the zip lock bag and secure all the straps for the remaining season. The stand is already hung and trimmed in. Sounds easy, huh? Well, it is with a little planning and organization in the spring.
Be careful hanging ladder stands. When I am hanging a ladder stand I secure one end of my hoist rope to the seat of the ladder. I will then lean it up against the tree (this can be very difficult for one person). Make sure to step on he lowest rung of the ladder to set it in the ground. I will have my assistant hold the other end of the rope tight to keep the ladder secure against the tree as I climb. As they hold it against the tree I will secure it with the provided ratchet strap.
Here is a basic list of the tools that I use when hanging tree stands:

Pole saw, chain saw, hand saw, pull up rope, safety harness, fanny pack, back pack, zip lock bags, permanent marker, reflective trail markers, orange flagging, screw in steps, wind checker, compass, toilet paper, etc.
Stand types- I use four basic styles of tree stands. They are ladders, hang-ons, climbers, and the Lone Wolf Alpha (separate category for this one). For permanent use I utilize ladder stands and large hang-on stands. I especially like the ladder stands for areas that my Dad hunts. They are comfortable, easy to get in and out of, and safer. Occasionally I will also use a climbing tree stand to access a new hunting area.
The fourth style of stand that I love to use is the Lone Wolf Alpha hang-on. This stand is super light and easy to hang. It is extremely portable and adjustable too. I like to use these stands in areas that I only plan to hunt once or twice a year. They are also good for areas where a permanent stand may be stolen. If you can't afford a lot of stands then buy just one of these stands. Here is what you can do. Pick as many stand locations as you like. Hang this stand and trim in your shooting lanes. I like to use screw in steps on these stand set ups because you can leave them in the tree. I will then pull down the stand. Now you have multiple set ups to hunt based on deer travel, wind direction, etc. Just throw this stand up in the tree that you want to hunt. The tree is already prepared for you. I absolutely love this set up!
You can also easily use the Lone Wolf to hang above an existing stand to film a buddy's deer hunt. You should have at least one of these stands in your arsenal. They give you the ability to really move around, keep the deer guessing, and cover your hunting area. I also use this stand with the Lone Wolf ladder sticks in the place of a climbing tree stand. They all weigh about the same but with the ladder sticks I don't have to find a tree without low hanging limbs. Keep in mind that deer movement changes through out the phases of the rut. This stand can help you do the same.
You should already know this but I want to remind you to purchase a quality tree stand cable lock for your stands. I prefer the bicycle lock over the traditional padlock style. They can easily cut the padlock with bolt cutters but the bicycle style is much more difficult to get through. I engrave a number on all of my keys and the locks to keep them straight.
Stand locations- First, lets discuss how high you should hang your stand. You can only hunt at your best if you are comfortable with your set up and feel safe. This means staying within your comfort level. Maybe that is 10 feet or it could be 30 feet. You will have to decide for yourself. However, you must utilize a quality fall restraint device to keep you safe. You owe this to yourself and your family! No excuses!
If you shoot a recurve bow, I would suggest that you stay under 18'. However, if you shoot a compound bow you can go higher. My ladder stands range from 17-21'. My hang on stands are usually between 20-25'. I like to be high in the trees for a couple of reasons. I want the deer to have to look up high to see my silhouette. I want to stay out of their natural field of view. I also like to be high to stay in the upper wind thermals. They higher you are the harder it is for them to smell you. However, the higher you are, the steeper your shot angle, especially on close shots. Go up as high as your comfortable in the tree. I know many successful hunters that harvest deer in stands that are under 15'. In fact, one of the biggest deer I have ever seen, walked under my stand at 12' and never knew I was there. If I have my choice though, I will be sitting in the tree around 22'.
Stand placement- I like to hang stands around feeding areas, transition areas, and on the edge of bedding areas to cover all phases of the rut. I also like to have two different set ups based on wind direction. My pro dominant wind direction is out of the south. However, the November cold fronts come out of the north, so my stands are set up accordingly.
When I hang a stand I usually have someone with me. Before I trim in the shooting lanes I climb up in the tree and ask my assistant to walk the deer trails for me. This helps me to decide if the the stand is in the right location and where I should start trimming in my best shooting lanes. I want to be able to shoot the deer trails in all directions. Sometimes bucks will walk 10 yards downwind of heavily used deer trails, so make sure it is clear to shoot a little past the trail.
Don't forget to take a hard look at how you can slip in and out of your stand without bumping deer. Use vegetation, topography, creek bottoms, wind direction, etc. to help hide your approach. You can hunt a stand numerous times if the deer don't know when you are using it.
I hope this information helps you. I am still learning, so if you have something that works well for you that I didn't mention, please let us know. Go hang some stands. It's not too late.
Wednesday, May 5, 2010
(A) 14 Step Season Prep: Step 9- Building Bedding Areas
 When I first started bow hunting seriously I focused a lot on food sources. Although food is vital to deer, I didn't place enough emphasis on bedding areas. Now my early season deer hunting concentrates on food sources but quickly turns to bedding areas or transition areas as the rut nears. Some of the farms that I have previously hunted were only good during the rut because they had outstanding bedding areas. However, some farms had poor hunting during the rut because they lacked good bedding areas. The trail camera picture above shows two bucks checking the downwind side of a good bedding area during the rut. They do this day and night if they aren't already breading a doe. Hunt doe bedding areas during the rut. Not just the traditional buck bedding areas. Sometimes does are going to head for some thick cover to hide from harassing bucks this time of year.
By now you should have completed most of your spring work to prepare for next deer season. Hopefully during your post season scouting, you successfully located good bedding areas. On one of the farms that I hunt, the bedding areas are somewhat minimized once the vegetation is thin in November. We have identified most of the current bedding areas but they don't seem sufficient for the current deer population. So this spring I worked with the landowner to build and expand an existing bedding area.
One thing we did back in March was identify the current bedding areas that the deer were using. We wanted to expand on this. There is a large ravine that runs north and south and is located in the center of the hunting property in the middle of the woods. This ravine is protected to the north by a highway and has a pond for a water source in the north end of it. The south end of the ravine dead ends at the beginning of huge agricultural fields. For the last two years, we have agreed with the land owner to stay out of this ravine. We wanted the deer to have a safe haven where there would never be any human contact or hunting pressure.
This March, the land owner and I decided to expand this bedding area. We fired up our chainsaws and cut down numerous trees on the north east edge of this ravine by the pond. We dropped almost every tree in an area approximately equal to half an acre. This really opened up the forest floor for more sunlight. We tried to cut the trees above waist high or higher. Our goal was to only make our saw cut deep enough for the tree to fall to a horizontal position. If the tree is still somewhat attached, it will continue to grow and sprout. Once we dropped all of the trees we had a very thick place for the deer to bed comfortably. There were some good deer trails already leading to this area.
A couple of weeks later I returned to this man made bedding area. I raked out a few bed locations removing the leaves, twigs, branches, etc. so the deer could be more comfortable. This is an area that we will continue to stay out of until next spring when we shed hunt. However, we will hunt the far perimeter edges as the deer leave this bedding area (200+ yards away). For this reason we built a big bedding area to hold a lot of deer at the same time. Numerous small ones are also a good option.
I can't stress to you how important it is to know where your deer are bedding. Once you know where they are sleeping and eating, all you have to do is hang a stand in between the two spots to improve your hunting success. Many hunters build new bedding areas or improve on existing ones. They can be large like the one I just described or very small. If you are going to build a bedding area, first think about how the deer will approach it, the direction they will face while in laying in it, how close can you get to hunting it, etc. The small bedding areas don't take much more time to build than it takes someone to hang a new stand location. Think about it. It is not to late to build or improve a bedding area and it could really improve your success for the next deer season.
Tuesday, April 27, 2010
(A) 14 Step Season Prep: Step 8- Planting Food Plots
Last week we finally finished planting our food plots. The timing was perfect because we had 4 straight days of rain which started the night we finished planting. Timing is everything when planting food plots. If we would have needed one more day to plant, it would have taken a minimum of 8 days before we could get back on the fields. When your planting, take advantage of the right weather when you can. If practical, I like to plant right before a rain.
My Dad and I currently plant all of the food plots on only one of the farms that we hunt (with one exception). This is the arrangement we have with the property owner. We plant 13 acres worth of gourmet foliage to hold the deer in the area. On one of the other farms we plant 3 acres of lush green clover. Our third farm is more of a transition area and isn't configured well for planting. The forth farm that we hunt is surrounded by crops until late November and the land owner has asked us not to plant food plots on the property.
There are a lot of variables that go into planting. Mainly the cost of fertilizer, seed, and fuel. The equipment that is available to you will also determine how far you can take this process. Over the last five years my Dad has purchased a disc, drag, plow, brush hog, and corn planter for his tractor. Dad reasonably purchased these items from farmers in the area that no longer used the equipment because it was too small for their big fields and larger tractors. Auctions are another good place to find cheap farming equipment but you will still need access to a tractor. We also bought a seed spreader and sprayer for the four wheeler. They make a lot of cool attachments for ATV's. Although they are expensive, this may be a better option for someone who doesn't own a tractor.
You may be asking yourself what should you plant on your farm. Well that really depends on your particular situation. There are too many variables to list in this article but I will give you some of the basic things to think about as I fill you in on what we planted. How you plant your seed will be dependent on the type of seed that you choose. It may need to be drilled or broadcast. We always spread 200-300 lbs an acre of fertilizer and then drag it into the soil of our food plots.
Field #1- This 3 acre field is bordered to the north by a treeline and a creek to the south. East and West of the field are good bedding areas. Thee years ago we planted half of the field in Whitetail Institutes Whitetail Clover. The deer love this stuff. The clover has come back so well each year that we haven't had to spray it for weeds. All we do is fertilize it in the spring and then mow it a couple of times during the summer with the brush hog. I have tried almost every clover out there and nothing has compared to Whitetail Clover! The second half of this field has been more of a testing plot in the past. The first year we planted it, we put in Buck Forage Oats with average results. Last year we planted cowpeas in the spring which the deer absolutely loved. However, the cowpeas didn't last into the fall so this year we planted standing corn. It has been our experience that the deer will hammer the clover from spring to early fall. As the fall season progresses they will switch to the corn during and after the rut. This should put deer in this field every day in all phases of the deer season.
Field #2- This is our largest field at approximately 5 acres. It is bordered by a treeline to the north and wooded creek bottom to the south. There is a pasture field to the east and CRP grass to the west. The deer usually approach this field from the south creek bottom and sometimes from the west CRP grass. Last year we planted this entire field in standing corn. The deer hammered it but not until late December and January. This was because the neighbor to the South had a 120 acre standing corn field that was too wet to harvest until December. Once his corn was harvested (which was abnormally late) the deer lived on our fields. This year we planted half of the field in standing corn and the other half in soybeans. The deer seem to love eating soybeans in the early fall. Then they stop eating them until late season. In the north east corner and south east corner of this field we placed 1/4 of an acre in Whitetail clover because this field is located so far away from fields #1 and #3, which also have clover in them. Again, this should put deer in this field almost every day. Don't forget to build cages for your fields that are at least 2x2 feet. That way the deer can't eat what is inside of them and you will now how much pressure you fields are receiving.
Field #3- This 2 acre field is in the shape of a horse shoe. We built it in the middle of the timber. There are bedding areas to the east and west of this field. To the north are all the trees we knocked down with the bulldozer. Sometimes the deer bed on the other side of these piles of trees. In the past this field has held a lot of moisture and been hard to plant. Last year we used Whitetail Institute's No Plow due to the excessive moisture. However, this field has drained well this year and isn't holding as much moisture. So, you can probably guess what we planted, it was Whitetail Clover. This field will be a gold mine especially in the early season.
Field #4- The last field we planted is 3 acres in size. It is bordered by CRP to the north and a creek bluff to the south. The east is made up of wooded fingers and the west is dense hardwood trees and bedding areas. Last year we planted most of the field in cowpeas. It held a lot of deer in the spring and summer but the plants no longer produced in the fall. So, like field #2, we planted half of this field in corn and the other half in soybeans to see how well they produced together.
With the exception of our clover fields last year, the deer did not hit our fields hard until late December. Many other hunters have told me they experienced similar results. This was because there were hundreds of acres of agricultural fields to the south of our property. Due to the wet fall last year, these fields were left standing all fall and became competition for our food plots. Would you go to a 5 acre corn field when you could go to one that was 240 acres? Plus the neighboring fields were full of milo and soybeans. This made it tough to hunt around our food plots last year. However, once the neighbor harvested these crops, our food plots were quickly consumed.
We don't necessarily plant food plots to hunt over them. Actually we try to hunt between the food plots and the bedding areas. You can quickly educate deer if you continually hunt over a food plot. The plantings are to keep the deer healthy and in the area. If you have a lot of agricultural fields in the area, then maybe you want to start by planting some Whitetail Clover. If you don't have much for crops in your hunting area, then you had better make your food plot as large as you can because they will probably eat them down before they can mature.
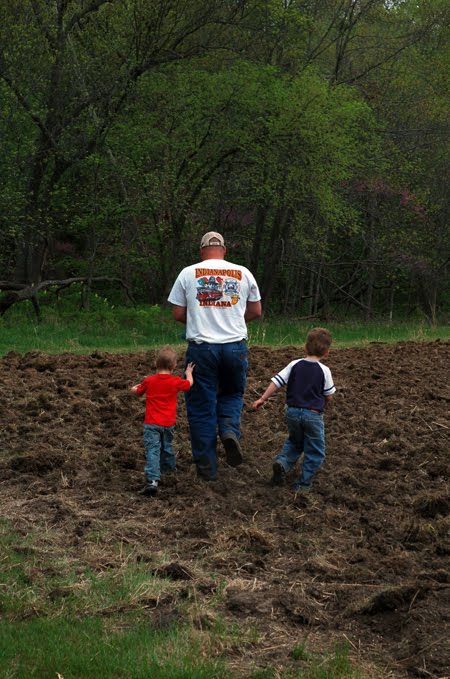
I encourage you to contact me if you have questions about planting food plots. I can only offer advise based on my experience but I would like to help you get results the first time you try this. Let me know if you have any suggestions, recommendations, or questions. If you are going to do some planting and you have kids, try to get them involved. I took my two boys with me to seed a field and they had a blast. Good hunting!

My Dad and I currently plant all of the food plots on only one of the farms that we hunt (with one exception). This is the arrangement we have with the property owner. We plant 13 acres worth of gourmet foliage to hold the deer in the area. On one of the other farms we plant 3 acres of lush green clover. Our third farm is more of a transition area and isn't configured well for planting. The forth farm that we hunt is surrounded by crops until late November and the land owner has asked us not to plant food plots on the property.
There are a lot of variables that go into planting. Mainly the cost of fertilizer, seed, and fuel. The equipment that is available to you will also determine how far you can take this process. Over the last five years my Dad has purchased a disc, drag, plow, brush hog, and corn planter for his tractor. Dad reasonably purchased these items from farmers in the area that no longer used the equipment because it was too small for their big fields and larger tractors. Auctions are another good place to find cheap farming equipment but you will still need access to a tractor. We also bought a seed spreader and sprayer for the four wheeler. They make a lot of cool attachments for ATV's. Although they are expensive, this may be a better option for someone who doesn't own a tractor.

You may be asking yourself what should you plant on your farm. Well that really depends on your particular situation. There are too many variables to list in this article but I will give you some of the basic things to think about as I fill you in on what we planted. How you plant your seed will be dependent on the type of seed that you choose. It may need to be drilled or broadcast. We always spread 200-300 lbs an acre of fertilizer and then drag it into the soil of our food plots.
Field #1- This 3 acre field is bordered to the north by a treeline and a creek to the south. East and West of the field are good bedding areas. Thee years ago we planted half of the field in Whitetail Institutes Whitetail Clover. The deer love this stuff. The clover has come back so well each year that we haven't had to spray it for weeds. All we do is fertilize it in the spring and then mow it a couple of times during the summer with the brush hog. I have tried almost every clover out there and nothing has compared to Whitetail Clover! The second half of this field has been more of a testing plot in the past. The first year we planted it, we put in Buck Forage Oats with average results. Last year we planted cowpeas in the spring which the deer absolutely loved. However, the cowpeas didn't last into the fall so this year we planted standing corn. It has been our experience that the deer will hammer the clover from spring to early fall. As the fall season progresses they will switch to the corn during and after the rut. This should put deer in this field every day in all phases of the deer season.

Field #2- This is our largest field at approximately 5 acres. It is bordered by a treeline to the north and wooded creek bottom to the south. There is a pasture field to the east and CRP grass to the west. The deer usually approach this field from the south creek bottom and sometimes from the west CRP grass. Last year we planted this entire field in standing corn. The deer hammered it but not until late December and January. This was because the neighbor to the South had a 120 acre standing corn field that was too wet to harvest until December. Once his corn was harvested (which was abnormally late) the deer lived on our fields. This year we planted half of the field in standing corn and the other half in soybeans. The deer seem to love eating soybeans in the early fall. Then they stop eating them until late season. In the north east corner and south east corner of this field we placed 1/4 of an acre in Whitetail clover because this field is located so far away from fields #1 and #3, which also have clover in them. Again, this should put deer in this field almost every day.
 Don't forget to build cages for your fields that are at least 2x2 feet. That way the deer can't eat what is inside of them and you will now how much pressure you fields are receiving.
Field #3- This 2 acre field is in the shape of a horse shoe. We built it in the middle of the timber. There are bedding areas to the east and west of this field. To the north are all the trees we knocked down with the bulldozer. Sometimes the deer bed on the other side of these piles of trees. In the past this field has held a lot of moisture and been hard to plant. Last year we used Whitetail Institute's No Plow due to the excessive moisture. However, this field has drained well this year and isn't holding as much moisture. So, you can probably guess what we planted, it was Whitetail Clover. This field will be a gold mine especially in the early season.

Field #4- The last field we planted is 3 acres in size. It is bordered by CRP to the north and a creek bluff to the south. The east is made up of wooded fingers and the west is dense hardwood trees and bedding areas. Last year we planted most of the field in cowpeas. It held a lot of deer in the spring and summer but the plants no longer produced in the fall. So, like field #2, we planted half of this field in corn and the other half in soybeans to see how well they produced together.

With the exception of our clover fields last year, the deer did not hit our fields hard until late December. Many other hunters have told me they experienced similar results. This was because there were hundreds of acres of agricultural fields to the south of our property. Due to the wet fall last year, these fields were left standing all fall and became competition for our food plots. Would you go to a 5 acre corn field when you could go to one that was 240 acres? Plus the neighboring fields were full of milo and soybeans. This made it tough to hunt around our food plots last year. However, once the neighbor harvested these crops, our food plots were quickly consumed.
We don't necessarily plant food plots to hunt over them. Actually we try to hunt between the food plots and the bedding areas. You can quickly educate deer if you continually hunt over a food plot. The plantings are to keep the deer healthy and in the area. If you have a lot of agricultural fields in the area, then maybe you want to start by planting some Whitetail Clover. If you don't have much for crops in your hunting area, then you had better make your food plot as large as you can because they will probably eat them down before they can mature.
I encourage you to contact me if you have questions about planting food plots. I can only offer advise based on my experience but I would like to help you get results the first time you try this. Let me know if you have any suggestions, recommendations, or questions. If you are going to do some planting and you have kids, try to get them involved. I took my two boys with me to seed a field and they had a blast. Good hunting!
Sunday, April 11, 2010
(A) 14 Step Season Prep: Step 7- Hunt the Turkey
Okay. As you can tell from my last posting, we are in turkey season and I have been spending most of my free time chasing thunder chickens. In Step 6 of our 14 Step process, we discussed how to talk to landowners. I actually talked to a couple of new landowners, or land managers, the other day and they were very accommodating to the idea of letting us bow hunt their properties. Once you obtain permission to hunt a new property, fall back to the previous steps we have discussed like post season scouting, etc...
Well, we have been working hard the last couple of months on our hunting property, so I like to break it up by turkey hunting. I am a die hard deer hunter but I enjoy turkey hunting more and more every year. The cold weather is over and it feels good to be outside in the warmth. I get the itch to start hunting again in the spring so chasing turkeys can be a lot of fun. During the first few weeks of the season, I typically will hunt field edges by productive roosting sights. I will bow hunt out of a ground blind and set up a few decoys. Then around 10 o'clock I will start scouting, shed hunting or working on deer stands again. In the afternoon, I will switch back to turkey hunting and try to get on some birds. As a minimum, I should be able to locate them by sunset to put them to bed on their roost. This will tell me where to set up the next morning. This system has worked well for me during the first part of turkey season. I also feel a sense of accomplishment as I get other jobs done during the middle of the day.
After the first three weeks of turkey season, I will usually pick up my shotgun to chase turkeys. They will be mating by now and I like to cover a little more ground to find them. There is a lot of vegetation on the trees so you can get away with a little more of the run and gun style. However, this may not be the best approach for you if your birds receive a lot of early season pressure. I have experienced good success in the mornings after 9 am and in the early afternoons this time of year. I will admit to you that I have only been turkey hunting for about 4 years, so I am still learning a lot about it.
Turkey season can be a lot of fun and is a great opportunity to sharpen your archery skills. If you get the chance, take someone hunting with you. Take your one of your kids, your wife, a friend, brother, etc.. Sitting in a ground blind will allow them to stay fairly comfortable and your calling should keep them engaged. You may hook someone else on hunting or at least justify to your spouse why we seem crazy about hunting. So, take a break from working for a couple of weeks and start chasing the THUNDER CHICKEN!
Well, we have been working hard the last couple of months on our hunting property, so I like to break it up by turkey hunting. I am a die hard deer hunter but I enjoy turkey hunting more and more every year. The cold weather is over and it feels good to be outside in the warmth. I get the itch to start hunting again in the spring so chasing turkeys can be a lot of fun. During the first few weeks of the season, I typically will hunt field edges by productive roosting sights. I will bow hunt out of a ground blind and set up a few decoys. Then around 10 o'clock I will start scouting, shed hunting or working on deer stands again. In the afternoon, I will switch back to turkey hunting and try to get on some birds. As a minimum, I should be able to locate them by sunset to put them to bed on their roost. This will tell me where to set up the next morning. This system has worked well for me during the first part of turkey season. I also feel a sense of accomplishment as I get other jobs done during the middle of the day.
After the first three weeks of turkey season, I will usually pick up my shotgun to chase turkeys. They will be mating by now and I like to cover a little more ground to find them. There is a lot of vegetation on the trees so you can get away with a little more of the run and gun style. However, this may not be the best approach for you if your birds receive a lot of early season pressure. I have experienced good success in the mornings after 9 am and in the early afternoons this time of year. I will admit to you that I have only been turkey hunting for about 4 years, so I am still learning a lot about it.
Turkey season can be a lot of fun and is a great opportunity to sharpen your archery skills. If you get the chance, take someone hunting with you. Take your one of your kids, your wife, a friend, brother, etc.. Sitting in a ground blind will allow them to stay fairly comfortable and your calling should keep them engaged. You may hook someone else on hunting or at least justify to your spouse why we seem crazy about hunting. So, take a break from working for a couple of weeks and start chasing the THUNDER CHICKEN!
Saturday, March 20, 2010
(A) 14 Step Season Prep: Step 6- Talking to Land Owners
In the last article I briefly discussed how to start looking for properties to hunt. Now that you have your contact lists of property owners, it is time to talk to them. This can be uncomfortable or difficult for most of us. However, it is part of the game for those of us who can not afford to purchase our own hunting land. Be assured that the more you work at this, the better you will get at it. Don't be afraid of rejection. It is going to happen. If you know this will be hard for you, I have a tip that might help. When my co-workers are preparing for a promotion I always suggest that they video themselves completing a practice interview. This will help to show if you lack confidence, make eye contact, and are able to properly present the information that you want your receiver to understand.
What's in it for the landowner: There are some things that you will need to decide before you talk to a landowner about hunting their property. The first item will be if you plan to gun hunt or bow hunt. I have found people to be more open minded to bow hunters over gun hunters. Explain to them that deer populations are at an all time high and it is unhealthy for the herd not to keep the numbers in control. Secondly, what is in it for the landowner? Why should they let you hunt? How much are you prepared to pay to hunt the property? A couple of years ago I read the average cost to lease hunting rights on a property was a dollar per acre. Well that is no longer true in this part of the Midwest. If the land is good for hunting and that landowner knows it, you can expect to pay up to $1000 per person each season.
There are other options. Maybe you offer the landowner $200 dollars up front and another $200 dollars if you harvest a buck (this is wise if the farm is new to you because it may have a poor deer population). Most landowners want you to harvest does to reduce crop damage, so tell them you will take 2 does off the property and give the landowner the venison. If you have a certain skill set, offer to trade services. Maybe you are good at fence repair or building decks. Maybe you offer to drive tractor for the farmer over two weekends out of the year. Figure out what will help you secure the property but stay within your financial means.
 On one of the farms that my Dad and I hunt has a landowner who also likes to deer hunt. So we offer to put in 13 acres of food plots annually and hang all of the deer stands. The first year we hunted that farm I let a 150" class mainframe 10 point walk twice. I took video of that deer at 20 yards both times and showed it to the landowner. He later harvested that deer (see picture) which was his biggest buck ever on his farm. I later shot a smaller 9 point but the landowner still thanks me for letting the deer walk so he could harvest him!
Leases: Not everyone is able to obtain exclusive hunting rights to a property especially during the first year that they hunt it. However, I strongly encourage you to do whatever you can to tie up the hunting rights on your hunting property. If a landowner tells you that you can hunt on his farm for free than why wouldn't he tell the next guy that came along the same thing. What is going to keep that guy from stealing your stand or spooking deer away? Worse yet, what if the next guy offers the landowner $800 dollars? You might get booted off a farm before you get to even scout it. This happens a lot with the growing number of hunting clubs. They are leasing up land quickly. So, try to sign a lease for at least 3-5 years on a property. Have an open discussion with the landowner discussing what your expectations are and what theirs will be. Make sure it is a good deal for them and that they won't regret your agreement later.
Making Contact: I have made contact with landowners by letter, phone calls, and in person. Most of my success has come from talking to the landowner in person. However, if you are not good at talking to people in person then pick another way to communicate. Contact these people and ask them if they would be interested in letting you hunt their property. If they say no, ask them if they would mind if you contact them again next year in case they change their mind. Regardless of their response, ask them if they know anyone who might let you hunt another property (friends, relatives, neighbors, etc.). I have stumbled on some good farms after someone told me I couldn't hunt their property but referred me to their neighbors. When making contact with the property owner, do the following:
Dress casual but nice
Properly introduce yourself, shake their hand and explain your purpose
Make eye contact and be polite
Smile and try not to seem intimidating
Talk to their level of communication
Don't act like a salesman
Have your contact information available to give them on a card that they can post easily
What's in it for the landowner: There are some things that you will need to decide before you talk to a landowner about hunting their property. The first item will be if you plan to gun hunt or bow hunt. I have found people to be more open minded to bow hunters over gun hunters. Explain to them that deer populations are at an all time high and it is unhealthy for the herd not to keep the numbers in control. Secondly, what is in it for the landowner? Why should they let you hunt? How much are you prepared to pay to hunt the property? A couple of years ago I read the average cost to lease hunting rights on a property was a dollar per acre. Well that is no longer true in this part of the Midwest. If the land is good for hunting and that landowner knows it, you can expect to pay up to $1000 per person each season.
There are other options. Maybe you offer the landowner $200 dollars up front and another $200 dollars if you harvest a buck (this is wise if the farm is new to you because it may have a poor deer population). Most landowners want you to harvest does to reduce crop damage, so tell them you will take 2 does off the property and give the landowner the venison. If you have a certain skill set, offer to trade services. Maybe you are good at fence repair or building decks. Maybe you offer to drive tractor for the farmer over two weekends out of the year. Figure out what will help you secure the property but stay within your financial means.
 On one of the farms that my Dad and I hunt has a landowner who also likes to deer hunt. So we offer to put in 13 acres of food plots annually and hang all of the deer stands. The first year we hunted that farm I let a 150" class mainframe 10 point walk twice. I took video of that deer at 20 yards both times and showed it to the landowner. He later harvested that deer (see picture) which was his biggest buck ever on his farm. I later shot a smaller 9 point but the landowner still thanks me for letting the deer walk so he could harvest him!
Leases: Not everyone is able to obtain exclusive hunting rights to a property especially during the first year that they hunt it. However, I strongly encourage you to do whatever you can to tie up the hunting rights on your hunting property. If a landowner tells you that you can hunt on his farm for free than why wouldn't he tell the next guy that came along the same thing. What is going to keep that guy from stealing your stand or spooking deer away? Worse yet, what if the next guy offers the landowner $800 dollars? You might get booted off a farm before you get to even scout it. This happens a lot with the growing number of hunting clubs. They are leasing up land quickly. So, try to sign a lease for at least 3-5 years on a property. Have an open discussion with the landowner discussing what your expectations are and what theirs will be. Make sure it is a good deal for them and that they won't regret your agreement later.
Making Contact: I have made contact with landowners by letter, phone calls, and in person. Most of my success has come from talking to the landowner in person. However, if you are not good at talking to people in person then pick another way to communicate. Contact these people and ask them if they would be interested in letting you hunt their property. If they say no, ask them if they would mind if you contact them again next year in case they change their mind. Regardless of their response, ask them if they know anyone who might let you hunt another property (friends, relatives, neighbors, etc.). I have stumbled on some good farms after someone told me I couldn't hunt their property but referred me to their neighbors. When making contact with the property owner, do the following:
Dress casual but nice
Properly introduce yourself, shake their hand and explain your purpose
Make eye contact and be polite
Smile and try not to seem intimidating
Talk to their level of communication
Don't act like a salesman
Have your contact information available to give them on a card that they can post easily
Additional things to think about: Okay, so the landowner has agreed to let you hunt on their property. Before you pay them a penny, ask them if you can scout the farm first to make sure it has good hunting potential. Ask the landowner where they normally see deer on the property. Ask them when it was hunted last or if they hunt themselves. Review the property lines with the landowner by using a vehicle or reviewing an aerial map. Does the property have any horses or grazing cattle? What gates can you drive through to make access (always close gates behind you)? Will the landowner allow you to use an ATV?
Another thing that you will want to do is protect your hunting equipment. Ask the landowner how they feel about food plots, game feeders, screw in tree steps, deer stands, ground blinds, and stand locations. Some landowners want to know where every one of your tree stands are located. Ask the landowner if he has the property posted. If not, will they let you post the property for them to protect your stands? How does the landowner want you to handle trespassers? Does the landowner want to see the animals that you harvest when you are leaving the property? Sometimes the wives of landowners ask that you don't show them a harvested animal because it bothers them.
Building Relationships: Let me stress to you that you need to go out of your way to build a solid trusting relationship with your property owner. Let them get to know you and the kind of person you are. Make sure that you always demonstrate appreciation for the opportunity to hunt their land. Keep constant communication with them. I call my property owners every couple of months to say hello and see if they need anything. Stop by their house periodically so they don't forget your face. Keep their land looking better than how you found it. Offer to give them venison sausage. Send them a Christmas card every year. Work to build a friendship and you will have better hunting! Show the landowner that you will care for their land as if it were your own.
Another thing that you will want to do is protect your hunting equipment. Ask the landowner how they feel about food plots, game feeders, screw in tree steps, deer stands, ground blinds, and stand locations. Some landowners want to know where every one of your tree stands are located. Ask the landowner if he has the property posted. If not, will they let you post the property for them to protect your stands? How does the landowner want you to handle trespassers? Does the landowner want to see the animals that you harvest when you are leaving the property? Sometimes the wives of landowners ask that you don't show them a harvested animal because it bothers them.
Building Relationships: Let me stress to you that you need to go out of your way to build a solid trusting relationship with your property owner. Let them get to know you and the kind of person you are. Make sure that you always demonstrate appreciation for the opportunity to hunt their land. Keep constant communication with them. I call my property owners every couple of months to say hello and see if they need anything. Stop by their house periodically so they don't forget your face. Keep their land looking better than how you found it. Offer to give them venison sausage. Send them a Christmas card every year. Work to build a friendship and you will have better hunting! Show the landowner that you will care for their land as if it were your own.
Thursday, March 18, 2010
(A) 14 Step Season Prep: Step 5- Finding Land to Hunt
How do you find land to hunt? This is a question I hear frequently from friends and co-workers. Well, I wish I could say this is an easy step but it is not. Finding new land to hunt is like your first day of high school. The more you can talk to people, the more friends you make, and the more comfortable you feel approaching people; the easier it is. The more you get to know people and network, the greater the opportunity to find land. First let me share with you some of the details about the land that I currently have to hunt. I will also discuss how I approach the process of finding new farms to hunt.
Experts suggest that you should have at least 100 acres to hunt per bow hunter. If you hunt with two friends, you should have at least 300 acres. It is also recommended that you have at least two separate farms to hunt more than 5 miles apart. This ensures that you are hunting an entirely different deer herd when moving from one property to the next. However, I know of successful deer hunters who hunt on only one farm that is made up of less than 80 acres. They are successful on this smaller property because they own the land and manage it exclusively for bucks. My point is that you have to start somewhere. If your property is small, manage it aggressively and keep the hunting pressure to a minimum.
I usually hunt with my Dad. However, I sometimes also hunt with my brother, cousin and a friend. Sometimes my brother-in-law also draws a tag and hunts with me. There is only about a 10 day period where we may all be hunting at the same time. So, that is why we have 4 farms to hunt. We usually split up to spread out on all 4 farms. This helps to keep the hunting pressure off the deer.
Experts suggest that you should have at least 100 acres to hunt per bow hunter. If you hunt with two friends, you should have at least 300 acres. It is also recommended that you have at least two separate farms to hunt more than 5 miles apart. This ensures that you are hunting an entirely different deer herd when moving from one property to the next. However, I know of successful deer hunters who hunt on only one farm that is made up of less than 80 acres. They are successful on this smaller property because they own the land and manage it exclusively for bucks. My point is that you have to start somewhere. If your property is small, manage it aggressively and keep the hunting pressure to a minimum.
I usually hunt with my Dad. However, I sometimes also hunt with my brother, cousin and a friend. Sometimes my brother-in-law also draws a tag and hunts with me. There is only about a 10 day period where we may all be hunting at the same time. So, that is why we have 4 farms to hunt. We usually split up to spread out on all 4 farms. This helps to keep the hunting pressure off the deer.
Last Season's Farms: Of the 4 farms that I hunted last season, only one of the farms was new to me. The first property (Property #1) was approximately 250 acres of mostly hardwoods, made up of ridges and ravines. We also have a 3 acre food plot on the edge of the hardwoods. My Dad obtained permission for us to hunt property #1 by becoming friends with the farmer who leased the harvest rights to this farm. Although I have taken 3 bucks over 150" from this farm, it has outside hunting pressure and is close to a housing development.
 The second farm (Property #2) is a 200 acre farm made up of mostly crop fields but it has approximately 80 acres of excellent creek bottom woods and thick brush running through the middle of it (great bedding areas). The bucks channel through this farm from other areas during the rut to check the numerous bedding areas for does. We began hunting property #2 after the manager of the local Co-op introduced us to the property owner. We have tried to lease this farm for 6 years but the landowner refuses. He likes to be able to tell his neighbors that they can also hunt his property if they ask. This farm is sometimes similar to hunting public ground. We never know who we will run into hunting.
The third farm (Property #3) that I hunt on is made up of approximately 320 acres. The property has everything on it including cedar thickets, creek bottoms, cliffs, flat CRP fields, etc. It is rural and bordered by the freeway to the north and huge crop fields to the south. My Dad and I annually plant approximately 13 acres of food plots on this property for the deer, at the request of the property owner. I found this farm by searching the area on maps that had a lot of woods bordered by crops. When I located a plat map I found the land owner and attempted to contact him. After searching for approximately two weeks I was finally able to make contact with the land owner. This process was more difficult because he did not live on the property.
The forth farm (Property #4) that I hunted last year was approximately 180 acres. The farmer lives on this property which has mostly alfalfa fields for the horses that graze on it. However, the north side of the property consists of heavy thick brush that you can barely walk through (great bedding areas) and large crop fields to the east on the neighbors property. Property #4 was found because the farmer who owns it, used to own property #3. We met the owner of property #4 through the owner of property #3. Sounds complicated, doesn't it? But this was a classic case of who you know.
Quick story- Approximately 5 years ago I was really lucky to find an Iowa property to hunt. My wife's grandfather asked me to sell his pickup truck for him. I ended up selling the truck to the son-in-law of the Iowa property owner. When the buyer came to pick up the truck I met the property owner and we started talking about deer and hunting in Iowa. By the time they left with the truck, I had an open invitation to hunt on their Iowa farm anytime I wanted. Lucky, huh!!
Even thought I have been successful in finding places to hunt, I have been turned down probably 30-40 times by property owners. I also have previously hunted 5 other farms in the past. However, 2 of them were sold and the 3 others did not have good hunting on them. I don't know if I will ever be completely satisfied with the farm that I am hunting until I own it. Unfortunately with my salary, that will not be anytime soon.
 The second farm (Property #2) is a 200 acre farm made up of mostly crop fields but it has approximately 80 acres of excellent creek bottom woods and thick brush running through the middle of it (great bedding areas). The bucks channel through this farm from other areas during the rut to check the numerous bedding areas for does. We began hunting property #2 after the manager of the local Co-op introduced us to the property owner. We have tried to lease this farm for 6 years but the landowner refuses. He likes to be able to tell his neighbors that they can also hunt his property if they ask. This farm is sometimes similar to hunting public ground. We never know who we will run into hunting.
The third farm (Property #3) that I hunt on is made up of approximately 320 acres. The property has everything on it including cedar thickets, creek bottoms, cliffs, flat CRP fields, etc. It is rural and bordered by the freeway to the north and huge crop fields to the south. My Dad and I annually plant approximately 13 acres of food plots on this property for the deer, at the request of the property owner. I found this farm by searching the area on maps that had a lot of woods bordered by crops. When I located a plat map I found the land owner and attempted to contact him. After searching for approximately two weeks I was finally able to make contact with the land owner. This process was more difficult because he did not live on the property.
The forth farm (Property #4) that I hunted last year was approximately 180 acres. The farmer lives on this property which has mostly alfalfa fields for the horses that graze on it. However, the north side of the property consists of heavy thick brush that you can barely walk through (great bedding areas) and large crop fields to the east on the neighbors property. Property #4 was found because the farmer who owns it, used to own property #3. We met the owner of property #4 through the owner of property #3. Sounds complicated, doesn't it? But this was a classic case of who you know.
Quick story- Approximately 5 years ago I was really lucky to find an Iowa property to hunt. My wife's grandfather asked me to sell his pickup truck for him. I ended up selling the truck to the son-in-law of the Iowa property owner. When the buyer came to pick up the truck I met the property owner and we started talking about deer and hunting in Iowa. By the time they left with the truck, I had an open invitation to hunt on their Iowa farm anytime I wanted. Lucky, huh!!
Even thought I have been successful in finding places to hunt, I have been turned down probably 30-40 times by property owners. I also have previously hunted 5 other farms in the past. However, 2 of them were sold and the 3 others did not have good hunting on them. I don't know if I will ever be completely satisfied with the farm that I am hunting until I own it. Unfortunately with my salary, that will not be anytime soon.
Research: Begin your search by determining how far you are willing to travel to hunt. I used to try to stay within 1 hour of drive time. However, we now have a camping trailer that my family uses during hunting season. So it would be okay for us to hunt a farm further away if the farm possibilities were worth the drive. What leads do you have? Think of friends and relatives that live in the country. Do your friends or relatives know others who live in the country. Start by making a contacts list of possibilities.
What if you don't know of any landowners? Well then you have a little more work to do. Figure out an area or county that you want to hunt. Then I would suggest that you get on Google Earth and start looking for possibilities. Look for large areas of woods that are isolated from homes, busy roads, and towns. You can also look for large wooded fingers that weave through crop fields. Once you pinpoint a wooded section that will hold deer, switch from aerial maps to the topo maps feature to look for draws, ridges, creeks, etc. Find at least three separate areas that you are interested in and then order a plat book from the county courthouse. This will show you the property lines, size of property, and names of the property owners.
So what do you do once you find a nice piece of ground. Well, you are going to have to talk to the land owner (I will discuss in my next article- Step 6) but there are a couple of things to do first. Is this property worth your time? Is there good bedding areas, food sources, water sources, and access for stand locations? Is there a high potential of trespassers or the competition of other hunters? Does the farm have good potential? Can you convince the landowner to let you plant food plots? Many of these answers will come once you talk to the landowner and scout the farm. Finding a good farm that isn't already being hunted is going to take a lot of persistence and a bit of luck.
If you are looking to purchase a farm than your timing couldn't be better. There are real estate companies like "Whitetail Properties" that list hunting properties exclusively. With a little time spent on the internet you should be able to find a reputable real estate agent. The number of properties for sale continues to increase because of our current economy. Prices have also dropped so you can find some good deals. Investors sometimes buy hunting properties, manage them for a couple of years, then sell them to buy bigger farms with their profits.
If you are looking to purchase a farm than your timing couldn't be better. There are real estate companies like "Whitetail Properties" that list hunting properties exclusively. With a little time spent on the internet you should be able to find a reputable real estate agent. The number of properties for sale continues to increase because of our current economy. Prices have also dropped so you can find some good deals. Investors sometimes buy hunting properties, manage them for a couple of years, then sell them to buy bigger farms with their profits.
Saturday, March 6, 2010
(A) 14 Step Season Prep: Step 3- Pulling Stands
I know that pulling tree stands after the deer season doesn't seem like a subject that will improve your deer hunting, but trust me on this one. For years I have asked people if they pull their stands every season or if they leave them in place all year. If they left them in the tree, I asked them for how long. One year, three years, how long is too long? All of the answers that I received were different and no one seemed to have a good answer. So, I contacted a few tree stand manufacturers and their suggestion was to leave a stand in a tree no longer than two weeks. A very safe answer but not necessarily a realistic answer. I know that certain trees can grow significantly in diameter over the time frame of one year. This can place a lot of stress on the tree stand straps. Weather and the sun can also deteriorate the condition of tree stand straps. So let me share with you what I do and let me know if you have better information.
Like you, I have various styles of stands. I like to use tie wire or old ratchet straps to hold my ladder stands and hang on stands in place. I only do this if I am going to keep the stand in the same tree for next year and I am not concerned about the stand being stolen (private property). I also must have a stand that allows me to temporarily remove the straps that are made for the particular stand (I replace the original straps in late summer). Otherwise, I pull the stand and hang it again in late summer. The only stands that I hang in the spring, regardless of circumstances, are the ones in or on the edge of bedding areas. I hang these stands in April or May and leave them alone until November. I still lock these stands down with a cable and lock.
I usually hang approximately 25 stands each season. So it can be a lot of work pulling them all down and keeping track of equipment. I don't like hanging stands at the last minute or in the hot summer sun so I try to do as much ahead of time as I can. The two things that take the most time while hanging stands are finding the right tree and trimming in shooting lanes. These two things jobs can leave a lot of scent in the area, spooking deer. So, I try to do these two things in the spring for my stand locations (we will discuss this in further detail in Step #9). This time of year the woods are very open and you can really gain an understanding of the topography of your hunting area. Deer seem to change their patterns slightly every year but usually the bedding areas and feeding areas stay the same.
Now let's talk about safety. Make sure that you are always wearing your safety harness when your working on your tree stands. I fell 18 feet off of a ladder once and I have paid dearly for it. I use a large diameter rope to hoist my hang-on stands up and down the tree. I also always have my cellphone on me in the event that if I were to fall, I can make a phone call for help. However, I strongly encourage you to take someone with you when you are working on your stands. They can help you carry equipment, cut shooting lanes, point out deer trails, etc. It is also a good idea for someone, other than you, to know where your stand locations are in the event that an accident happened while you were hunting.
This time of year I like to analyze how a stand worked for me prior to pulling it down. Was the wind right for the stand? Did I see good deer movement or shoot a deer from the stand? Was the stand right for the phase of the rut that it was intended for? Would I hunt it again in this particular spot or do I need to make a change? Was it trimmed in appropriately for good shooting? Did the sun blind me in the morning or evening? Did I usually bump deer trying to access the stand? Did I have enough back cover once the leaves dropped or did I sit out like a sore thumb? What trails were the deer using? Can I shoot those deer trails from this tree? Do I need to move the stand 20 yards or maybe 70 yards? All of these are the questions you should be asking yourself to save time next season.
Once I determine the effectiveness of a tree stand location, I make modifications prior to pulling the stand. If I like the stand location then I improve my shooting by trimming it in again. If I must remove the stand for reasons listed above, I will then pull the stand and mark the base of the tree with a small circle of white paint. This helps me find the tree in the late spring or summer when the vegetation has returned to the woods. If I need to make a minor move with the stand (within visual distance of the current stand location) then I will climb up in the stand and point out the exact location that I want the new stand location to a buddy. Once I have the person in position for the new stand location, I will climb down from the stand and walk over to the new location. I make sure there is a tree to accommodate the move. Then I will pull the stand from the old tree after identifying the new tree stand location.
Now let's talk about safety. Make sure that you are always wearing your safety harness when your working on your tree stands. I fell 18 feet off of a ladder once and I have paid dearly for it. I use a large diameter rope to hoist my hang-on stands up and down the tree. I also always have my cellphone on me in the event that if I were to fall, I can make a phone call for help. However, I strongly encourage you to take someone with you when you are working on your stands. They can help you carry equipment, cut shooting lanes, point out deer trails, etc. It is also a good idea for someone, other than you, to know where your stand locations are in the event that an accident happened while you were hunting.
Let me take this opportunity to give you one last tip. Create a stand inventory system for equipment. I like to number my stands and assign them to certain farms. If the stand requires ladder sticks, I give them a number assigning them to a particular stand. I keep all straps in a gallon size Zip lock bag. Inside the bag I also include a pull up rope, cable/lock, and hook for the pull up rope. I like to hang my back pack from this hook once I am hunting in the tree. Then I number the Zip lock bag to correlate with the tree stand that it belongs to. This may seem like a lot of work but it is much easier to manage this at home rather than out in the woods.
So get out there and start pulling or moving your stands. The longer you wait the warmer it is going to get and the closer it is to turkey season. As I previously stated, the spring would be the busiest time of year for us. You will soon see that we have 6 more steps to accomplish before summer!
Thursday, March 4, 2010
(A) 14 Step Season Prep: Step 2- Shooting Form and Practice
During the winter, it can be hard to go outside and shoot in the cold weather after season. One thing I have done to keep my skills sharp in the past is shooting in archery leagues. They have leagues for 3-D targets or dart systems (you place a special tip on your arrow and shoot at a large screen that projects images of animals on it). These leagues usually start in January for the indoor range and run through the summer for the outdoor range. Check your local archery shop for these opportunities because they can be a blast with your hunting buddies. They will also help you to break in your new equipment while motivating you to shoot more.
Let's talk about shooting form. First of all let me say that I am by no means an expert on shooting form. Nor do I claim to be a professional. However, I have shot in archery leagues and learned some tips from professional shooters along the way. These tips have helped me to remain competative and place in the top five in most of the leagues that I have participated in. Hopefully they will help you too. For those of you who are advanced shooters, this will serve as a good reminder to get back to the basics.
1. Practice approach: I am sure that you have all heard the saying "Perfect practice makes perfect". I believe this and try to take my practice sessions very seriously. I start by limiting how often I practice. I usually don't shoot my bow more than 3 times a week. This will prevent your muscles from building muscle memory. I also try to limit my shooting sessions to 30-60 arrows. I do this to maintain proper shooting form. The more arrows you shoot, the better the chance of building bad habits. I also try to build a routine when I shoot. From the way I grip the bow, to nocking an arrow, to my follow through. It is all an instinctive routine that I don't have to think about. It is kind of like a golfer with his putting routine. Everyone on the PGA tour prepares differently for a putt but each individual uses their same routine on every green.

Let's talk about shooting form. First of all let me say that I am by no means an expert on shooting form. Nor do I claim to be a professional. However, I have shot in archery leagues and learned some tips from professional shooters along the way. These tips have helped me to remain competative and place in the top five in most of the leagues that I have participated in. Hopefully they will help you too. For those of you who are advanced shooters, this will serve as a good reminder to get back to the basics.
1. Practice approach: I am sure that you have all heard the saying "Perfect practice makes perfect". I believe this and try to take my practice sessions very seriously. I start by limiting how often I practice. I usually don't shoot my bow more than 3 times a week. This will prevent your muscles from building muscle memory. I also try to limit my shooting sessions to 30-60 arrows. I do this to maintain proper shooting form. The more arrows you shoot, the better the chance of building bad habits. I also try to build a routine when I shoot. From the way I grip the bow, to nocking an arrow, to my follow through. It is all an instinctive routine that I don't have to think about. It is kind of like a golfer with his putting routine. Everyone on the PGA tour prepares differently for a putt but each individual uses their same routine on every green.
2. Grip: This is one of the most common mistakes that I see people making. They don't grip their bow correctly. When you hold the bow in your hand, the riser should start between the index finer and thumb, working down to the heel of your hand (fatty part of your hand below the thumb. This should create a loose grip and should cause your nuckels on your hand to be at a 45 degree angle away from the riser (see picture). Keep your fingers off the riser and keep your hand as loose as you can. This increases accuracy and minimizes torque. Just let the bow sit inside your thumb naturally. When you grip the bow this way it rotates your forearm away from the bow string. When shooting with this grip you will be much more accurate and should never hit your arm with the bow string again. Don't grip the bow with a vertical closed grip. This creates too much torque.

3. Drawing the bow: Hopefully your bow is already set up to your specific draw length. When you draw the bow it should be smooth. If you shake a lot or fight to draw it back then your poundage is set too high. You can always dial the bow up later in the season as you build your shooting muscles. As you come to full draw and find your anchor spot, you should feel comfortable. Your bow arm should be straight but not with a locked elbow. Your release arm should help to create a natural "T" shape as you feel like your pinching your shoulder blades together (see picture). If your bow wants to creep forward on you then your draw cycle may be too short. If you have to struggle to keep from locking the elbow on your bow arm then your draw length may be too long. Make sure your anchor point is consistently in the same spot. I anchor on a spot on my lower jaw. Once you anchor, you should be able to touch your nose on the bowstring slightly as you look through your peep.

3. Drawing the bow: Hopefully your bow is already set up to your specific draw length. When you draw the bow it should be smooth. If you shake a lot or fight to draw it back then your poundage is set too high. You can always dial the bow up later in the season as you build your shooting muscles. As you come to full draw and find your anchor spot, you should feel comfortable. Your bow arm should be straight but not with a locked elbow. Your release arm should help to create a natural "T" shape as you feel like your pinching your shoulder blades together (see picture). If your bow wants to creep forward on you then your draw cycle may be too short. If you have to struggle to keep from locking the elbow on your bow arm then your draw length may be too long. Make sure your anchor point is consistently in the same spot. I anchor on a spot on my lower jaw. Once you anchor, you should be able to touch your nose on the bowstring slightly as you look through your peep.

4. Aiming: As you aim, pick a spot within your target. In the movie "The Patriot", Mel Gibson asked his two young boys to shoot at British Soldiers after they killed the older brother to the boys. Mel Gibson's character tells the boys to "aim small, miss small". This is great advice for shooters. When shooting at an archery target finding the smallest target or dot that you can. When shooting at deer, pick a tuft of fur that is off color or find something that stands out visually on the animals vitals. As you aim at a target your pin is going to move around it. This is natural so don't try to force the pin to stay frozen on the target all of the time. As you aim, keep both eyes open, center your sight ring inside the peep, put the pin on the target and the arrow should release on it's own. As you aim, the arrow will find the target, just give it time.
5. The release: Your release of the arrow should happen instinctively. Many of my best shots on animals occurred before I was consciously ready to touch the trigger. It just happened smooth and without a conscious effort. The tension setting on your release should be set so you can place your finger on the trigger without it firing. However, there should be minimal trigger travel and tension. When someone starts loosing accuracy it usually is from torquing the grip or trigger punching. To build a smooth release or to improve to a smoother release, set up a target about 6 feet away from you. Draw the bow back and close your eyes. Release the arrow smoothly keeping your eyes closed. You can try this in your garage or basement with a block target. Work on this for a couple of weeks and the problem should be rectified.
6. The follow through: Many people forget about this step in shooting. Once the arrow is released, continue aiming at the target. You should also feel the bow rocking forward, tipping towards the ground. This is because you are maintaining your loose grip, right? Don't worry, you won't drop the bow. Your hand will naturally re-grip the bow so you don't drop it. You can also shoot with a wrist sling to give you additional confidence that you won't drop the bow. However, make sure the wrist sling isn't too tight because when you're hunting you will probably be wearing gloves.
7. Wrapping it up: When you start your practice sessions, make that first arrow count! This is what you will have to do out in the field so don't rely on your tenth shot to be your best. Most good shooters concentrate on only one or two aspects of their shooting form when practicing. Don't overwhelm yourself in your shooting sessions. Eventually you will build your own shooting routine that is consistent and instinctive. Many pro shooters stick to their instinctive routine and don't focus on aspects of their form when competing. When competing they have a saying that they use or maybe they have a memorized bible verse. This helps them slow down and relax under the pressure, concentrating only on the target. The same principle could be applied to shooting at a trophy buck to minimize "buck fever".
More shooting tips:
1. On elevated shots (tree stands), draw straight back (horizontal) and then bend at the waist to aim at your target. If you don't do this you will hit high on your target. In the heat of the moment it is easy to forget this rule when shooting at an animal and it has cost me three big bucks over the years. This simple rule must be ingrained in your practice sessions.
2. If you plan to hunt in the wind, rain or bad weather conditions you should practice in them. Also practice from various positions. Try shooting while your on your knees, sitting down, etc.
3. I live in Kansas so I am often hunting or shooting on windy days. One thing I do, is throw a hand full of grass up in the air and see how it is drifting. I know this seems old school but stay with me on this. Based on the distance the grass carries and direction I can make an adjustment. These are two ways to deal with the wind. If you shoot a sight on your bow with a level bubble on it, you can canter the bow watching the sight bubble. As the bubble moves outside the center line figure out how much the bow shoots to one side or the other (practice this on days with no wind). The second method for shooting in the wind is just to figure out how far you need to aim left or right in a cross wind.
4. Start your practice sessions at 20 yards and finish them at 20 yards. This builds confidence. You should also be practicing out to 50-60 yards. I am not saying you should shoot at animals at this distance. However, this extended distance will emphasize bad shooting form and make those 30 yard shots seem like slam dunks.
5. If you have multiple bows, consider setting one up for tree stand hunting and one for shooting on the ground. I call these my vertical and horizontal bows.
Wednesday, February 24, 2010
(A) 14 Step Season Prep: Step 1
Step 1: Archery Equipment
Have you ever felt rushed or pressured when opening day of archery season finally arrived? Did you ever feel frustrated because the season was here and you still weren't ready. Maybe you still had deer stands to hang, hunting gear to organize, farms to scout, fall food plots to plant, broadheads to tune, the list goes on and on. Even as a fairly organized person, I still haven't had everything ready by opening day. This year, we are going to work together to stay organized and be ready for opening day. Through this blog we will talk about how to finish our projects using a 14 step process. We need to start now though, because we only have 7 months left. As you will soon see, spring will be the busiest time for us as we build our foundation for the rest of the season. We have a lot of work to do so let's get started!Dust off that bow and start shooting.
The first thing we need to do is pull out our bow and start shooting at targets. This may not be what you expected as our first step but let me explain my thought process. With January bringing an end to our season, our shooting form should still be somewhat consistent. Continue to keep it that way. As a minimum try to shoot at least 30 arrows once or twice a week this year. This will help prevent the "September scramble" as you try to regain your form. You owe it to yourself, and the animals that you pursue, to maintain your shooting skills. Besides, target shooting can be fun (I will discuss shooting form and practice next time which is step #2). If you're like me and turkey hunt with a bow, turkey season is only a month away so start shooting your bow now.I really enjoy turkey hunting. It is fun to call to, and communicate, with a big ol' gobbler. I look forward to the sound of him drumming as he struts his stuff coming in close enough for a shot with my bow. It is a great accomplishment for any archer to successfully harvest a turkey with a bow. However, I still enjoy deer hunting more than turkey hunting. So, I use turkey season as a trial run for my new archery equipment in preparation for deer season. If you want to change your bow set up (sight, rest, arrows, release, etc.), do it now. Don't wait until right before deer season. If you want to purchase a new bow for this season, buy it now. That way you can start breaking in your new equipment while having fun turkey hunting. Get your new equipment mounted, get your old or new bow tuned up, and start shooting. I usually find it exciting to change something on my bow set up and start practicing with it as long is I am not rushed.
If your a gun hunter, shoot that shotgun before the season and check your pattern. This will give you added confidence when your chasing turkeys. If you want more details on this process, check out the Primos DVD called "Mastering the Art: Guide to Spring Turkey Hunting". They have some great information and tips.
Tune up your bow and adjust as necessary.
If you are like me and will be shooting a new bow this year (I chose the Mathews Z7), we have some work to do. Start by shooting 120+ arrows with the bow. Then take it back to your archery shop to fine tune your string, peep and any other adjustments. This year I had to buy new strings and cables for my back up bow too (Mathews Switchback), so I'll repeat the process with that bow. Once your strings and cables are broke in, mark the position of your limbs on your cam. This will tell you if you have a problem with your bow or string later on down the road.My new Z7 and a marked cam
(see the gray lines on both sides of the limb in the cam picture)
(see the gray lines on both sides of the limb in the cam picture)

You may be asking yourself how often should you replace your strings or cables. That all depends. My general rule is to replace them every other season (I use Winner's Choice). Americas Best also makes good strings and I've heard that Mathews Barracuda strings have improved in performance. No matter how good your strings and cables are, they can stretch after a couple of years. It is important to note here that you need to stay current on waxing your bowstrings and cables. Now, if you are rough on your bow and your bow string shows signs of significant fraying, even after one season, replace your string and cables now. This will save you a lot of problems and time down the road. Keep your old string and cable as a back up though. You never know if you will need it, especially if you only have one bow.
Where should you buy your archery equipment? Well, if you live in the Kansas City area, I would highly recommend Roger's Sporting Goods. Their prices are very good and they have a knowledge archery staff to help you out. If you don't live in the Kansas City area, I would check out websites like Lancaster Archery, Eagle Archery, Bowhunters Supply Store and the Keystone Country Store. If you are looking for used equipment to buy or sell, try the Archery Talk Classifieds or Ebay. Good luck and let me know if you have any questions or need assistance with this.
Making your equipment checklist.
My last tip on your equipment: Go through all of your hunting equipment and check it. Make sure nothing is missing and replace any broken items. I wash all of my clothes and check them over for holes or tears. As I place my clothes or gear in plastic storage bins until next season, I make a list of things that need to be replaced, repaired or items that I wish to purchase. This helps me remember what I need prior to the next season. That way I can watch for sales or specials all spring and summer on items that I need. This saves me a lot of money annually!
Subscribe to:
Posts (Atom)